Accessories, Beauty Tools, Beginner, Hair, How-To, Lime Crime

No Roll Sock Bun Tutorial

donut bun 1

Lips: Pink Velvet by Lime Crime

Look at your girl! She got up on time this morning, and worked it out for y’all! I didn’t just do makeup, oh no. I made a hair tutorial, too.

WHO AM I?!?!?

I’m the shit.

What I’m not, is a good hair doer. Like, these big donut buns have eluded me because my hair is sort of short and full of layers. That was a bummer because I do love a bun. All bunz. Lucky for me, laziness and frustration breeds ingenuity, and I figured out a way to make it happen without all the arm killing rolling, and without my layers sticking out everywhere.

Since I’m not big on hair that takes a lot of time and effort, this tutorial is suuuuper easy. Like, the whole thing will take you less than five minutes. All you need is two big hair ties (rubber bands?), a hair donut, and a bunch of bobby pins. CHECK IT OUT.

STEP ONE

step_1_sm

Pull your hair up into a high ponytail, securing it with a rubber band. Pin up any stragglers that fall down in the back. Then, pull your ponytail through the donut, and settle it against your head. Make sure you use a larger donut, since we won’t have the volume you get from rolling all the hair into it.

STEP TWO

step_2_sm

Pull the hair from your ponytail down over the donut. Making sure to evenly spread it all the way around the donut, so none of the mesh is showing.

STEP THREE

step_3_sm

Take another large rubber band and pop it over the donut to hold the hair in place where you want it. As you can see, sometimes this takes a couple tries to get the right angle. Make sure everything is smooth, even, and covering the donut.

STEP FOUR

step_4_sm

Pull the ends of the hair around the rubber band to cover it, pinning it in place as you go. If you need to, you can stick pins up into the donut. It’s super easy.

step_5_sm

Pin the hair all the way around, adjusting the bun as you go to make sure everything is exactly where you want it. After that, I like to pull a little hair down in front of my ears just to soften it up. But, that’s up to you.

And that’s it!! It’s so easy!

donut bun 2

I like to add a little something extra around the bun, just to make everything look super correct. This is my new twist scarf from ban.do. It has wire inside it, so it pretty much does whatever I want it to do. You can use whatever; scarves, necklaces, bracelets, cute pins or barrettes. I’d say the possibilities are endless, but that’s probably not right. You know what I mean, GO CRAZY!

Was this a revelation for anyone else?! I was so excited when I figured it out!! My normal messy bun isn’t always appropriate for all outfits and occasions. This new option is pretty great.

I hope you guys like it! Let me know!!

Standard
Beauty Tools, Beginner, Education, Eyeshadow, Kevyn Aucoin, SALE, Smashbox

Santa Bunny: Beginner’s Bundle

Along with Fall (my birthday, Halloween, no more bathing suits), Christmas is one of my favorite times of the year. Christmas the day is whatever to me; I love giving and getting presents, but all that cooking and cleaning can get out of here. The month leading up to Christmas is awesome though! People are nicer to each other, there are lights, and songs, and ornaments, and hot cocoa, and cookies! CHRISTMAS MOVIES! I’ve already watched “Christmas Vacation,” and “Love Actually.” I’ll hit “Scrooged” and “White Christmas” sometime soon. I’m emotionally gearing up for “Miracle on 34th Street,” and I’m saving “It’s a Wonderful Life” to watch with my mom. We like to cry together over that one. Stupid George Bailey gets me every time.

So, looking forward to Christmas, and inspired by a conversation I had with a friend, I’d like to help out with your shopping. Is my gift guide late to the party? Of course it is! Late to the party is my middle name. I actually like to BE late to parties. I wait just long enough for people to start wondering if I’m coming, and then BOOM there I am, drink in hand, making all your dreams come true.

This guide is for the budding makeup artist in your life, or for anyone who wants to improve their skills and get a little education.

“Making Faces” by Kevyn Aucoin

makingfacesbook

Amazon, $16.69

I wrote about my adoration for this book a couple months ago. I’ve had my copy for nearly 15 years, and I still break it out all the time. I learned a lot about makeup application from my mom, but where her knowledge ended, this book picked it up. It’s extremely comprehensive and easy to understand, with clear instructions and pictures. Kevyn doesn’t just show you how to do eyeshadow, he shows you how to build your entire face from your bone structure up. His two makeup books are the only two I own. Nothing else comes close. “Making Faces” is an excellent guide for anyone, beginner or more experienced.

Buy “Making Faces” HERE.

Sonia Kashuk Limited Edition Lavish Luxe 10 piece Brush Set

Brush set

Target, $29.99

If you’re buying for a beginner, you probably want to get them brushes that are nice, but not too expensive. This Sonia Kashuk set fits the bill perfectly. Are they the most high quality, makeup artist level brushes in the world? No. But, they’re pretty nice. Every Sonia Kashuk brush I have has stood up to frequent use and cleanings without any problems. This set is a good place to start building a brush collection. It has everything a beginner should need, and some stuff they’ll probably have to figure out. That’s fun though! That’s learning! I bought a set of brushes in beauty school almost 10 years ago that had a weird shaped brush in it. I never could figure it out until just this year! Mystery solved! The new artist in your life will get a lot of use out of these brushes, and they’ll be glad to not have to use those weird sponge foam tipped applicator things. Do they even put those in makeup anymore? Am I showing my age? Wait. Does pantyhose still come in eggs? Does anybody wear pantyhose anymore?! The internet sure has changed everything!

It doesn’t look like this brush set is available online, but they have it in store. At Target’s site, you can search the stores close to you for specific products, so that makes things easy.

Find the Sonia Kashuk Lavish Luxe Brush Set HERE.

Smashbox Wondervision Mega Palette

Screen Shot 2013-12-10 at 10.02.46 AM

Ulta exclusive, $39.00

I JUST reviewed this palette last week, and it’s on sale now! How fortuitous! Last week, I talked about how I thought this palette would be fantastic for beginners, anyone who wants to expand their options without spending a lot of money, and anyone who struggles with palettes in general. I stand by all of that! With 30 shadows, 3 blushes and 1 bronzer, it’s got almost everything you’d need to start learning. The colors are wide ranging and beautifully coordinated with different finishes and consistencies. The palette even comes with clear, plastic instructional cards you place over the shadows to learn how to apply different eyeshadow looks. It was a great deal at $49, it’s a KILLER deal at $39. Plus, right now, with any $30 Smashbox purchase at Ulta, you get deluxe sample sizes of their fab Classic Primer and Photo Op Eye Brightening Mascara. Even better!

Buy the Smashbox Wondervision Mega Palette exclusively at Ulta HERE.

Throw in a couple of lipsticks or lip glosses. NYX and E.L.F. both have cheap, but good lip products. And right now there are tonnnnns of lipstick and gloss sets that are crazy cheap. Add in some brush cleanser because it’s never too early to learn to keep your tools clean and well maintained! You can get everything I’ve shown here for $85. So you can get a couple lippies and a cleanser and still keep it under $100. This will all make for a good start, and a happy makeup lover!

Standard
Beginner, Eyeshadow, Face, How-To, Smashbox

Smashbox Wonder Vision Mega Palette

smashbox wonder vision palette

Ulta exclusive, $49

WHEW! This palette was a chore to swatch and photograph. It’s really hard to shoot a picture of a mirror without capturing your own reflection. Have you ever caught your own face in a reflective surface before you had to time to prepare yourself? Yuck, right? It’s like that, but instead of being a passing glance, it’s there on your camera roll so you can really look at how squishy your chin looks.

Photography problems aside, I’ve been having so much fun with this palette! It’s been sitting in front of my mirror since I brought it home, and I’ve used it almost every time I’ve done my makeup since then. It’s the first non-Naked palette I’ve bought in a long time, and with 30 shadows, 3 blushes, and a bronzer, I think it’s a good buy.

This post is going to be long on photos, maybe short on words. We’ll see. I never set out to write most of the stuff I end up posting.

smashbox wonder vision inside

smashbox wonder vision interior

This palette contains a wide array of colors and finishes, and they’re all coordinated to make putting together looks easier. I tried to swatch all the colors on my arm, but, they didn’t show up like I’d hoped. This is the first time I’ve swatched a whole palette! Bear with me!

smashbox wonder vision swatch 1

smashbox wonder vision 2

smashbox wonder vision 3

Most of the colors were very easy to work with, the exception being some of the matte, light colored shadows. A couple of them took a few more swipes of the brush to get them to show up bright, but that’s ok. They were still manageable, and I didn’t go, “Eww. No.” Which I’ll totally do! It wasn’t even close to a deal breaker for me. I’ll take a buildable color over a garish mess any day. Those couple of semi-sheer shadows were nothing when you put them with the rest of the shadows in this palette. The satin, and shimmery shadows were absolutely gorgeous. They blended nicely and the color payoff was great. The silver, in particular, was soooo pretty.

I know a lot of people are intimidated by palettes. I’ve heard from two people just in the last week that they don’t know where to start with palettes, they aren’t sure how to use them, so they just don’t buy them. I understand that. That makes me sad though because palettes can be a really great buy. They’re particularly great if you want to expand your makeup collection without spending a lot of money. This Smashbox palette has 30 shadows in it for $49. Their eyeshadow trios contain colors that are just a touch bigger than the shadows in this palette, and those are $28. I think this palette would be great for beginners, or anyone who gets overwhelmed by their choices because Smashbox has made this palette very easy to use. Besides the coordinated colors, it comes with four clear plastic cards that show you how to combine colors to achieve a more in depth look. They’re really cool because you just place them over the colors you want to wear, and you can see exactly which colors you should be using where.

smashbox wonder vision card

Isn’t that rad?! I used the cards myself a few times to check them out, and the directions were clear and easy to handle. It’s a good way to learn a little more about how to apply shadows. Once you get the hang of it using the cards, you’ll probably feel more confident on your own with other shadows!

These are a couple looks I’ve done with this palette since I’ve had it. I don’t always take pictures in front of my lights and backdrop every time I do my makeup, we’d never get out of the house if I did. But, I did grab a couple. The first one is primarily silver, and the second one uses the rust colored shadows show above.

smashbox wonder vision look1

smashbox wonder vision look2

Sorry about the lighting in the last photo. I didn’t intend to use this picture here, I was just looking at my own face. You know how in Clueless, when Cher is picking out outfits, she says she always takes polaroids because she doesn’t trust mirrors? It’s the same thing as that. I catch things that need to blended or touched up all the time like this. Plus, I like  any opportunity to look at a good picture of myself!

The blushes are nice, they’re also buildable, so that’s good. I think a lot of people prefer that in a blush. The bronzer is GREAT. It isn’t shimmery, so it’s good for contouring. I’ve been using it to bring up my cheekbones, and I love it. I predict I’ll hit the pan on the bronzer, actually.

This palette is a good buy financially and artistically. It has colors that can take you to a lot of different places with a lot of different looks. It makes application easy to understand, and easy to do. It would be really good for traveling. Wait. Do other people travel like I do? Does this seem like a lot to bring with you? I don’t think it does. You could slip this in between a couple of shirts, no problem. Then, you’d have neutrals and bright colors for whatever you wanted to do! It’s so easy!

Buy the Smashbox Wonder Vision Mega Palette exclusively at Ulta HERE.

Standard
Beauty Tools, Beginner, Eyeliner, How-To

Cat Eye Tips

stila

Look. I’m a little bit of a bullshitter when I need to be. I think I might be the World’s Smartest Lady, so I’m usually pretty confident in my ability to figure things out. I’ll fake it until I make it. Unless I think I can’t make it, then I’m all, “This is stupid!” and I quit. Who needs to keep at something stupid? Also, I can dish it out, but I can’t take it. That piece of info is neither here nor there, but, I thought since I was freely discussing the worst parts of my personality, it was worth mentioning.

What I am not faking is my ability to do a killer cat eye. I wasn’t always good though. I’ve spent lots and lots of time making a huge mess of my eyelids. But, at this point, I’ve been working at it for 15 years, so it doesn’t intimidate me anymore. I can bang out an even, perfect line in just a couple minutes. It’s extremely satisfying, and I want that feeling for you too.

I thought I’d share a couple tricks I use that might help you achieve a cat eye!

1. Draw the tail first! That’s the hardest part, but it’s easier if you do it first, and then connect it to the rest of the line. You can always build if you need to, but you’ll have a good line to follow. Pick a static, easy to find spot you can match to the other side, and start the end of your tail there. Like, line up the end of your tail under the end of your eyebrow, then do the same thing on the other side.

2. Do your bad eye before you do your good eye. You guys know what I mean, right? Your dominant hand will be the same side as your good eye. I’m sure you’ve already figured that out though. It’s way easier to match a good eye to a bad eye than it is to do it the other way around. I can’t tell you how many times I’ve drawn a beautiful cat eye on the right side, only to draw a completely different cat eye on the left side. It’s so annoying. That’s how you start down the slippery slope of, “I’m just going to even this up a little!” You know where that gets you. Nowhere good.

3. Start with a thin line. You can make it thicker little by little. This is self explanatory.

4. If you really struggle with liquid liner, consider switching to a gel liner with an angled brush. Years and years ago, when I would still take half an hour to do my liner, Benefit came out with a thin, angled eyeliner brush that totally revolutionized the cat eye for me. I used it for a long time, and it made my eyeliner so much easier, it was ridiculous. After I went back to liquid liner, I didn’t really have the same struggles. Those brushes are like liquid liner training wheels.

sonia liner brush

This one is available at Target for $5.99. I have it, and it’s solid. The angle makes it much easier to see what you’re doing, and it feels more natural in your hand. Get a little pot of liner, and you’re good to go!

5. PRACTICE! Like I’ve said here before, you might be bad at something the first few times you try it, but you probably won’t be bad on your twentieth time. If you have the time and attention span, do your cat eye, wipe it off, and do it again. Or, do it on days you don’t have anywhere to be. The experience adds up, especially if you’re working at it regularly.

These are the best tips I can think of right now. Keep at it and you’ll grab that cat by the tail, I promise

I hope these tricks help!

Standard
Beginner, Education, Guest, How-To, Lab Bunny Crew

Newbie to Junkie: Tips for Beauty Beginners

Today, I have a post from MY NEW INTERNET FRIEND, STEPH. I asked her to write a guest post after another friend, Denys, said she thought, based on Steph’s comments, she’d be a great fit for the site. After Denys pointed it out, it seemed so obvious! DUH. The only reason I missed it was because I spend most of my time thinking about myself. 

Because cosmetics and beauty have always been a part of my life, I often forget that not everyone has the experience and know-how that I do. It’s come up here before. Steph pitched her idea for a post about tips for beginners who are looking to step up their beauty game, and I was like, YES, DO THAT!! Her recently acquired knowledge is thorough and insightful. She’s a natural! 

I’m super excited to have her stepping outside the comment box and into the spotlight! I hope you all enjoy reading what she has to say as much as I did. Thanks for your great comments and warm messages, Steph! I’m so happy your voice is a part of The Lab Bunny!

*****

Steph post photo

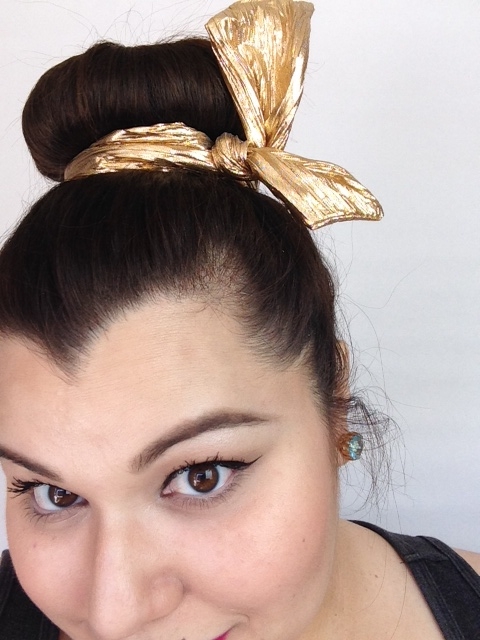
Hi!  I’m Steph, fellow beauty junkie!  I’ve been a fairly regular commenter on The Lab Bunny and was extremely flattered to be asked by Sarah to guest post.  I’m a novice when it comes to makeup, especially compared to Sarah’s mad skills, but I’ve been actively working to get better over the last year.  I want to offer some advice on getting started to my fellow newbies, but first I want you guys to understand why I stayed away from makeup for so long. 

My first experience with makeup was a traumatic one.  I was in the fourth grade and had been picked to represent my school for a fundraiser.  Being the representative was a BIG DEAL; I wanted to look perfect for my moment onstage, so I asked my stepmom to give me a makeover.  She agreed, and I immediately started imagining what I’d look like once she was done.  I’d never worn makeup before, but even at that age I was a firm believer in its ability to make the ordinary into something more.

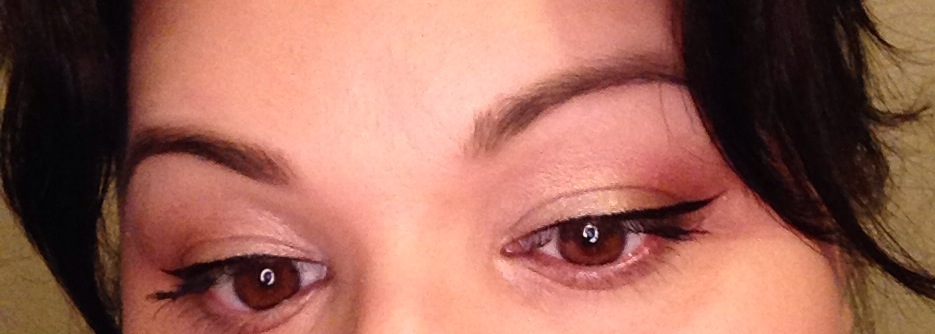
I remember sitting down in the dining room, surrounded by her beauty tools.  As she went to work, I envisioned what the end result would be.  I was guessing I’d pretty much look like Cindy Crawford or Jennifer Aniston.  As soon as she finished, I raced into the bathroom to check out how gorgeous I’d become, only to see this staring back at me:

mimi

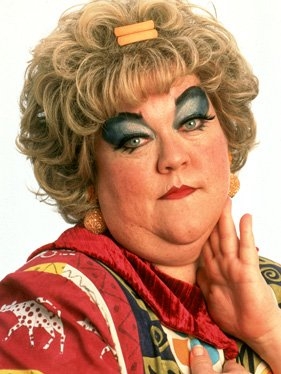
I wish I was joking, but I had bright red lipstick, an insane amount of blush, clumpy mascara, and blue eyeshadow for days.  I’ve got nothing but love for Mimi, but I just don’t have the coloring to pull that kind of look off.  As I stared at my reflection in horror, I heard my dad call to me that it was time to head out.  There was no fixing this before school started.

I’m not going to get into the details of how that day went down for me, other than to say that the adults at my school were surprisingly polite about my brand new baby hooker look.  Predictably the other kids were assholes.  I decided that day that makeup was not to be trusted.  Some people looked good with it, but I was not one of those people.  I stayed pretty far away from makeup after this, except for lip gloss and mascara when I occasionally went to a school dance.  Luckily I was a big tomboy in high school, so it didn’t come up often.

It wasn’t until I hit my mid-twenties that my girly gene finally kicked in.  I started small by having mini spa days every few weeks, complete with manicures, face masks, and deep hair conditioning treatments.  To me, these things are basically the gateway drugs of the beauty world.  They take almost no knowledge or expertise to use successfully, so using them served as a good transition into girliness.  After a few months of that, I felt ready to start tackling makeup again.

Getting into makeup can be really intimidating.  There are a million different products, many of which you may not have realized existed before.  Below is the best advice I have for someone who’s just starting out.

Know what look you’re going for, and don’t get overwhelmed.  There are so many different ways to do your makeup, and if you don’t get an idea in your head of what you like, it’s going to be hard to decide where to start.  Take some time to look at pictures and think about what speaks to your.  Do you want to look natural?  Dramatic?  Retro?

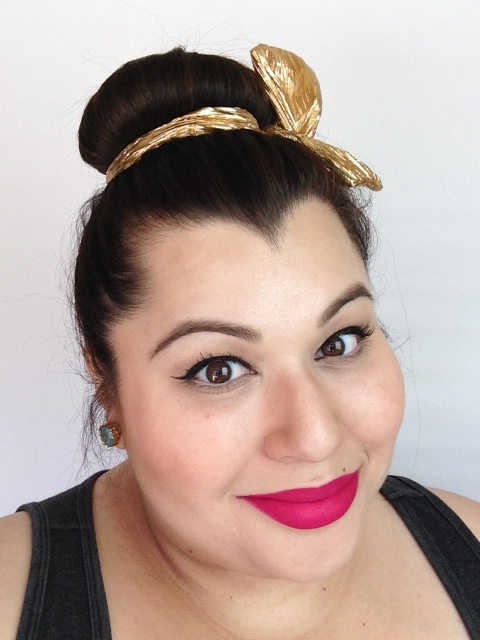
Personally, I’m obsessed with a perfect cat eye and really red lips.  When I started out, I knew that’s what I wanted to be able to do; it helped me get an idea of what products (other than the basics) I need to buy and what techniques I needed to learn.  Going to a makeup counter and asking them to give you an application in your favorite style is also a good idea before you start buying products.  A smoky purple eye could look amazing on you, or it could make you look like you’ve just gone up against Mike Tyson for a few rounds in the boxing ring.  It’s best to find that out before you buy the eyeshadow.

Practice every chance you get.  DO NOT wait until an hour before you’re leaving the house to attend a party to become an expert on creating the perfect smokey eye.  You will fuck it up, you won’t have enough time/expertise to fix it, and the night will end in tears.  When the pressure’s on, stick with tried and true makeup you’ve done in the past.  Practice applying colors, products, and looks you’re never used or done before when there’s no rush.  One of my favorite times to test new tricks out is just before I wash my face at the end of the night.  Even if I completely screw it up, I only have to look at my face for a minute before it becomes a clean slate again.  There are still things I regularly make a mess of, but practice really does make perfect.

Use the internet!  Seriously guys, it’s not just for porn anymore.  There are a million different resources available, including everything from product reviews to step-by-step tutorials.  Whenever I’m getting ready to buy something new, I do a ton of research before I take the plunge so I don’t get stuck with something I hate.  Once you’ve got a short list of products you’re interested in, head to a Sephora, Ulta, or department store makeup counter and test all the things.  There is no substitute for getting a product in your hands and checking it out for yourself.  I always feel better about making a big makeup purchase if I do both of these before I pull the trigger.

Some of my favorite online resources for buying products and getting tutorials (other than The Lab Bunny, of course) are listed below.

Reddit’s Makeup Addiction Subreddit (http://www.reddit.com/r/MakeupAddiction/)  Reddit can be an awful place sometimes, but their Makeup Addiction subreddit is fantastic.  You’ll find links to articles, tutorials, information about new products, and before and after pictures.  You can also post your own pictures up for constructive criticism and suggestions on your makeup.

Reddit’s Makeup Exchange Subreddit (http://www.reddit.com/r/makeupexchange/)  This is another really useful subreddit, and it’s one of the first places I go when I want to try a new product.  It’s premise is this: users post up lists of the products they have that they’d like to get rid of, or lists of products they’re trying to track down.  Other users can then offer to swap products from their own collection, or buy products outright.  Sometimes the products are used/sanitized, sometimes they’re brand new.  I’ve had great luck trading here; this month alone I picked up Urban Decay foundation and the Urban Decay Naked 2 palette for well below retail.  More details on how the swapping system works are listed on the site, and there are many other makeup swapping sites out there if this concept interests you.

Temptalia (http://www.temptalia.com/)  This is one of the greatest sites for product reveiws.  Not only do you get detailed descriptions, ratings, and gorgeous swatches to look at, duplicate shades from other brands are linked so you can check out all the options available to you.

The Beauty Department (http://thebeautydepartment.com/)  This site has so many comprehensive how-to guides for basically every aspect of makeup application.  If you don’t even know how to apply foundation yet, The Beauty Department can help.

xoVain (http://www.xovain.com/) This site has a lot of good (and completely random) makeup tutorials.  They did “how to look like Bowie” earlier this year!  Alle’s posts in particular are wonderful.

I hope this was helpful!  I know I’m kind of long-winded, so thanks for putting up with my rambling.

Standard