Did you guys know you could patch a torn natural nail? I didn’t. All these years, I’ve been breaking one nail and then mournfully cutting off the other nine. Finding out now that things could have been different all along, well….it smarts. Growing out your nails is hard work! You can’t open soda cans, umm, you have to wear rubber gloves when you wash dishes, you have to be careful opening doors and stuff. Like I said, hard work!
Almost 2 weeks ago, I found a little tear in one of my nails. It was the kind that was up in the pink, so you know it’s bad. Not only are you going to lose your nail with one of those tears, but it’s going to hurt like a mother in the process. Then, you have to deal with that soft, pink, nail bed. It’s like a turtle without a shell! Just all exposed and sad. I’ve been growing out these nails since my white manicure, and I was not going to let them go without a fight. After a little internet sleuthing, some television, maybe a nosh, I headed for the Sally Beauty closest to my house to see what I could work up.
SIDE NOTE: Do you guys dislike going to Sally like I do? Maybe it’s because I usually beauty supply shop in the pro shops (ASSHOLE ALERT), but the Sally stores, and most of the girls working in them, are kinda tacky and dated. Am I just a snob?

Damn.
During my investigative process, I found people saying you could fix a nail with fiberglass nail wraps and nail glue. So, at the beauty supply, I ended up buying this ASP Nail Wrap Kit. I *think* it’s for doing at home acrylics, but it has everything in it, besides alcohol, you’d need to do a nail repair.
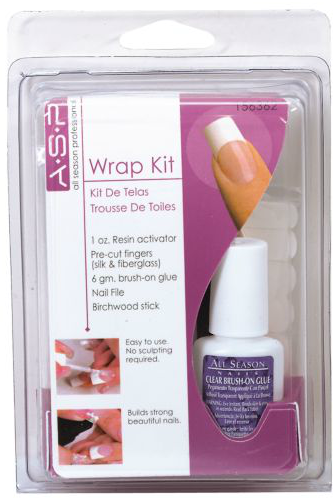
ASP Nail Wrap Kit, Sally Beauty, $14.99-$16.99
This is so, so, so easy. Stupid easy. You’ll be shocked!
First things first, gather up your supplies. Besides the kit, you’ll need little scissors, tweezers, rubbing alcohol, cotton balls, a paper towel, a plastic shopping bag, and a nail buffer. I use this buffer.
This particular kit comes with “resin activator” whatever that is. I didn’t show you those steps, because I don’t think they’re necessary. You could just buy nail glue and fiberglass nail wraps to do this if you don’t want to get the kit.
The only pre-steps warnings I have are these: DO NOT touch your nail with your other fingers after you’ve cleaned it. Be careful not to touch the wraps themselves too much too. You really don’t want any finger oils compromising your patch. AND, the paper towel is for under your work area. Come on, be responsible. Don’t flick nail glue all over your table.
Last warning: pee first. That’s good advice for all nail work right thurr.
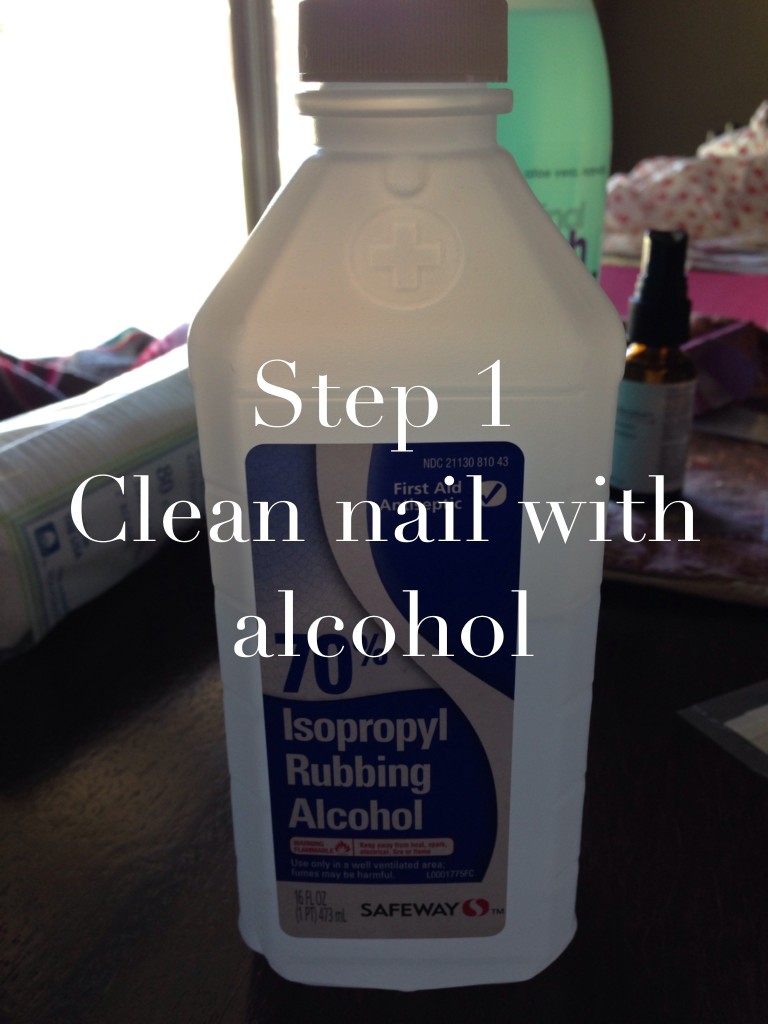
This part is so important. You have to remove any oil from your nail, or the patch won’t take. Clean your nail in the direction of the tear, so you don’t make it worse.
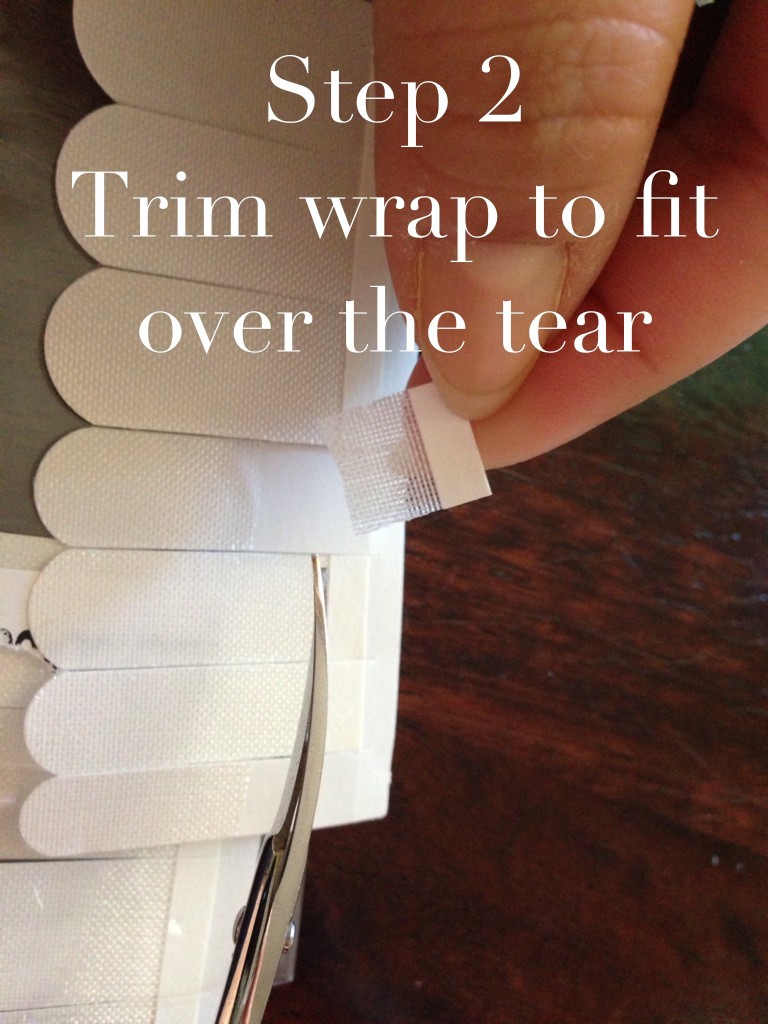
Trim just enough to cover a little past the tear, and enough to wrap under if you can.
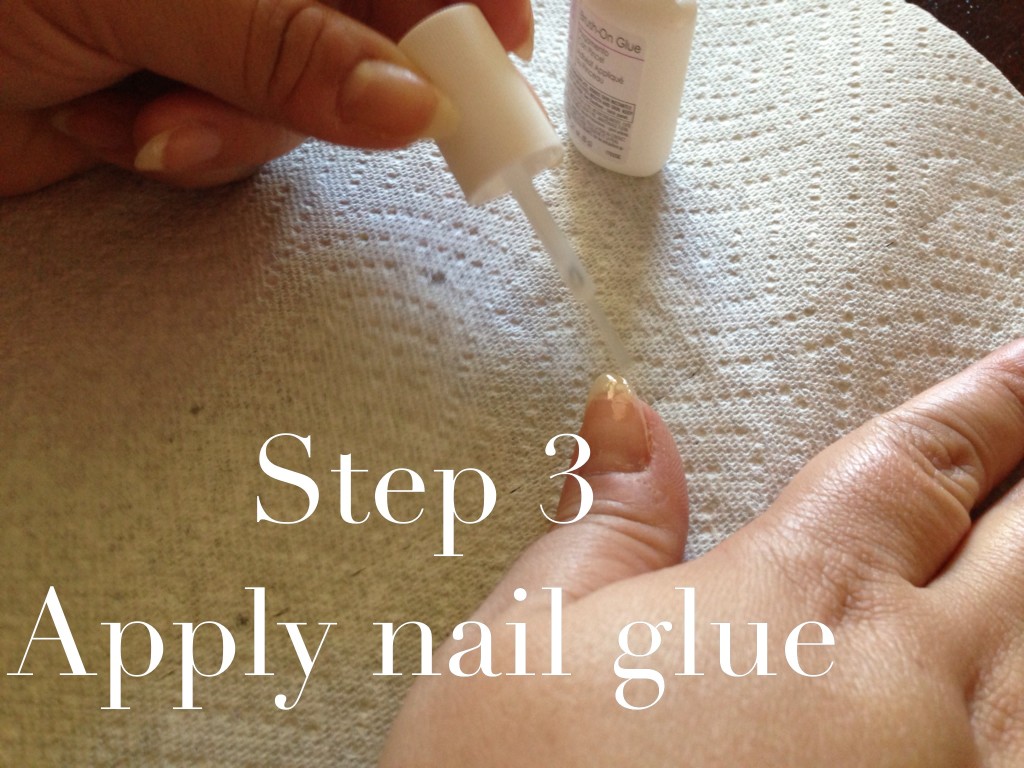
I didn’t put it on my entire nail, just the area with the tear.
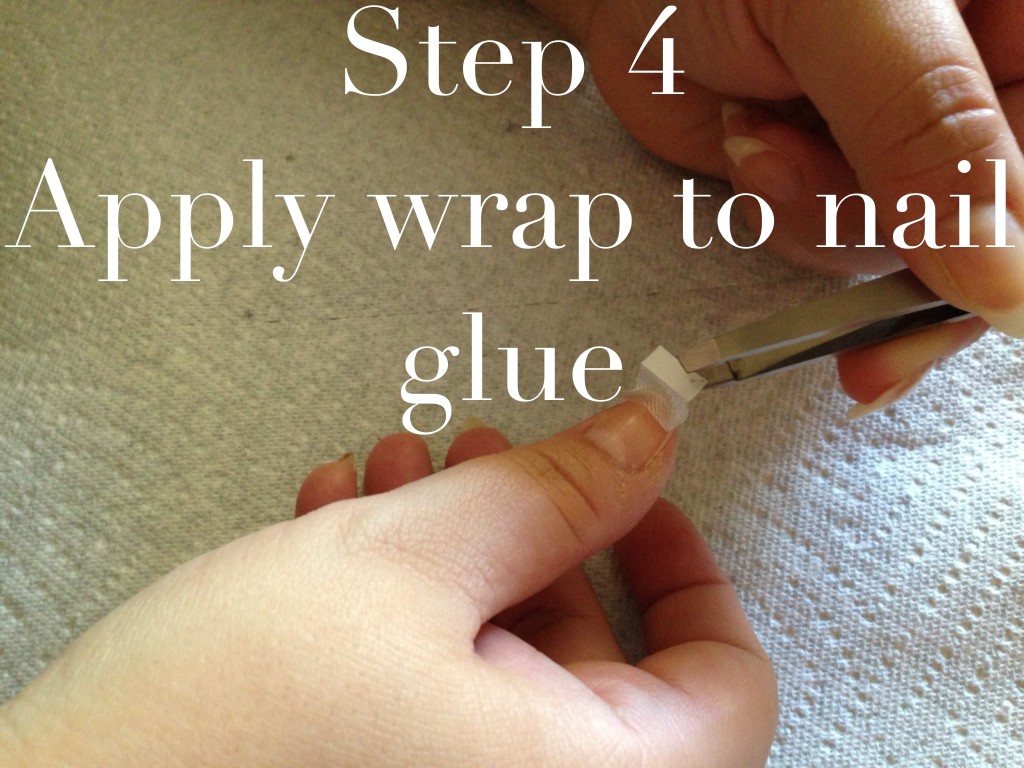
Use your tweezers to carefully place the wrap. Don’t use your fingers. Oils!
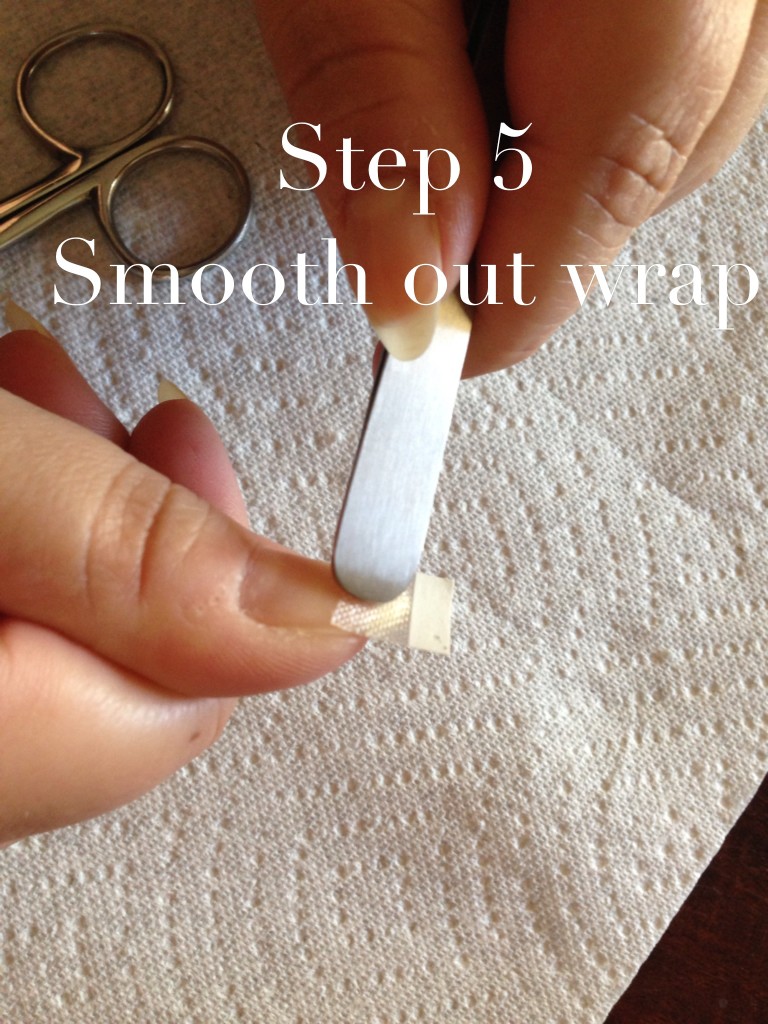
Using your finger inside the plastic bag, or the round end of your tweezers, smooth out the wrap.
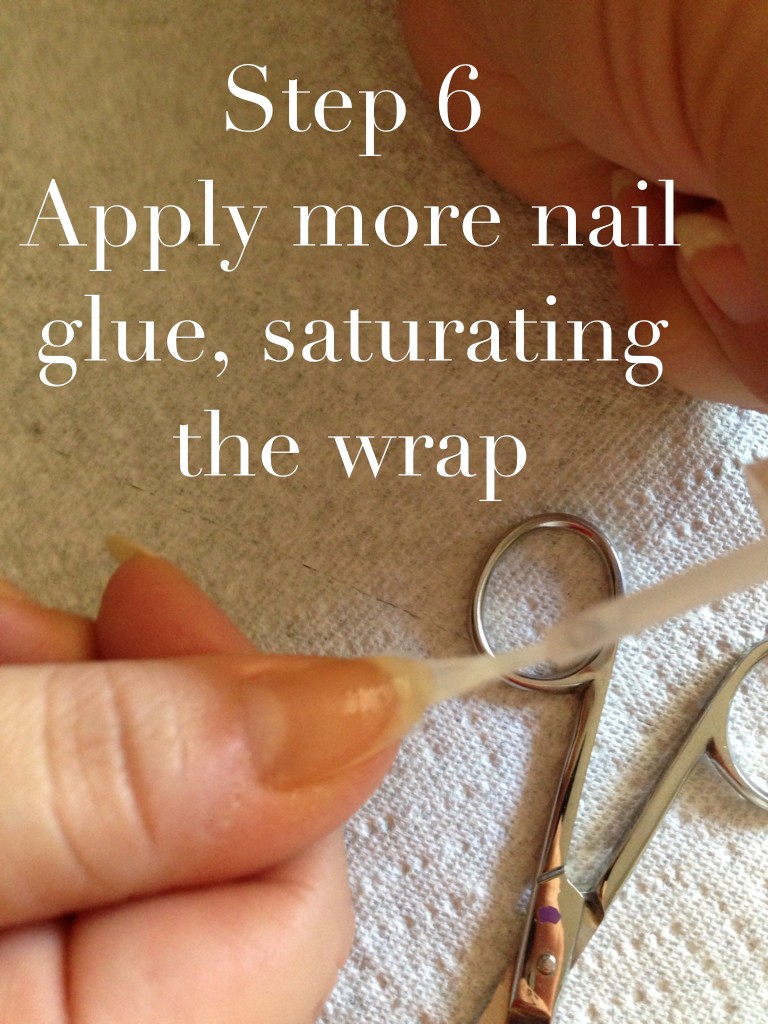
Don’t glob it on, but be sure the wrap is fully saturated and smooth on the nail.
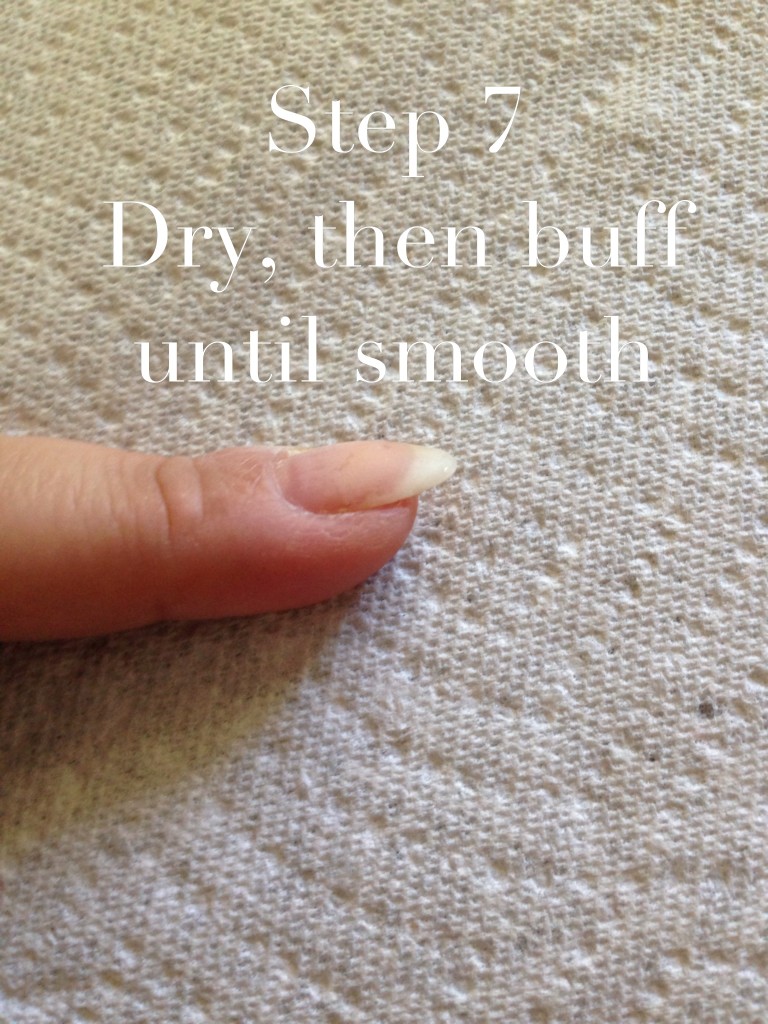
When the glue is dry, about 15 minutes, using a nail buffer, buff the nail until all the shiny spots are gone.
And that’s it! It might seem like a lot of work, but once you get the hang of it, not counting drying time, it took me maybe 2 minutes per nail. Way less time than it takes me to trim and shape all ten nails, and way less time than it takes to grow out a new one. I’ve had 2 patches on for nearly two weeks, and they don’t show any signs of lifting, peeling, or failing. My patched nails are all still intact, and under polish, you can’t even tell they’re there. Even without polish, you can’t really see the wraps.
Isn’t this so exciting? This is a whole new innovation for me. Nail repair! The way of the future!

Thank you so much for this post. So helpful considering the hell I put my nails through everyday as a legal secretary. I will remember this next time for sure. I don’t like getting my nails “done” but I love having them look nice in a very natural way. This is a great fix for the natural look.
Isn’t it rad?! I can’t believe I didn’t know you could fix them. I’m glad it was helpful for you! xo
Looks super cinchy ! Thanks for the step by step with photos .
Does the product hold up under reapplication of polish (acetone & polish)?
It says acetone will remove it, and you can tell that it would, but I’ve never had any problems with my patches coming loose. I do removals and reapplications on the same patches. I try to avoid thick layers of glitter though. Removing that would probably do some damage to the integrity of the patch.
The “Resin Activator” is to avoid those 15 minutes. It’s supposed to dry up the glue instantly 🙂
Janey!! Thank you!! Mystery solved!