

Lips: Pink Velvet by Lime Crime
Look at your girl! She got up on time this morning, and worked it out for y’all! I didn’t just do makeup, oh no. I made a hair tutorial, too.
WHO AM I?!?!?
I’m the shit.
What I’m not, is a good hair doer. Like, these big donut buns have eluded me because my hair is sort of short and full of layers. That was a bummer because I do love a bun. All bunz. Lucky for me, laziness and frustration breeds ingenuity, and I figured out a way to make it happen without all the arm killing rolling, and without my layers sticking out everywhere.
Since I’m not big on hair that takes a lot of time and effort, this tutorial is suuuuper easy. Like, the whole thing will take you less than five minutes. All you need is two big hair ties (rubber bands?), a hair donut, and a bunch of bobby pins. CHECK IT OUT.
STEP ONE
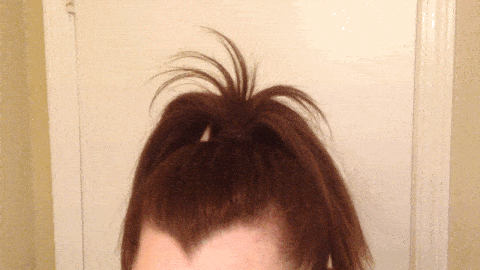
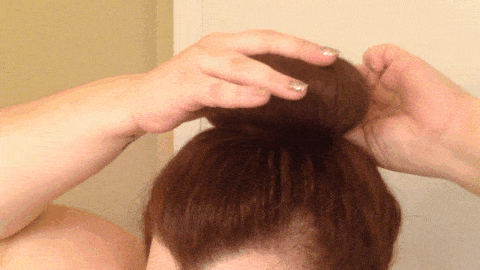
Pull your hair up into a high ponytail, securing it with a rubber band. Pin up any stragglers that fall down in the back. Then, pull your ponytail through the donut, and settle it against your head. Make sure you use a larger donut, since we won’t have the volume you get from rolling all the hair into it.
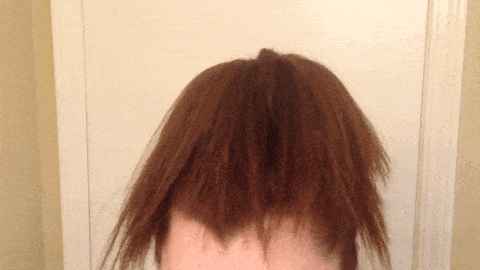
STEP TWO
Pull the hair from your ponytail down over the donut. Making sure to evenly spread it all the way around the donut, so none of the mesh is showing.
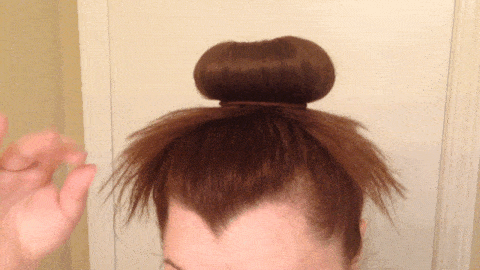
STEP THREE
Take another large rubber band and pop it over the donut to hold the hair in place where you want it. As you can see, sometimes this takes a couple tries to get the right angle. Make sure everything is smooth, even, and covering the donut.
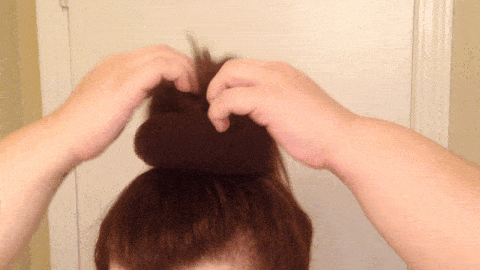
STEP FOUR
Pull the ends of the hair around the rubber band to cover it, pinning it in place as you go. If you need to, you can stick pins up into the donut. It’s super easy.
Pin the hair all the way around, adjusting the bun as you go to make sure everything is exactly where you want it. After that, I like to pull a little hair down in front of my ears just to soften it up. But, that’s up to you.
And that’s it!! It’s so easy!

I like to add a little something extra around the bun, just to make everything look super correct. This is my new twist scarf from ban.do. It has wire inside it, so it pretty much does whatever I want it to do. You can use whatever; scarves, necklaces, bracelets, cute pins or barrettes. I’d say the possibilities are endless, but that’s probably not right. You know what I mean, GO CRAZY!
Was this a revelation for anyone else?! I was so excited when I figured it out!! My normal messy bun isn’t always appropriate for all outfits and occasions. This new option is pretty great.
I hope you guys like it! Let me know!!
Have a told you lately that you’re a genius and I love you? Because this works like a charm and I never would have thought of it on my own. My hair is a bit thin and layered, so every time I tried to roll one of the down it just looked terrible. This looks great and it took like 2 minutes. Finally, someone who posts hair DIYs that someone can do without multiple stylists assisting them!
GIRL, YAY!! I’m so happy it works for you! Now my only problem with sock buns is keeping them from bumping into things.