Floss Gloss, Nails

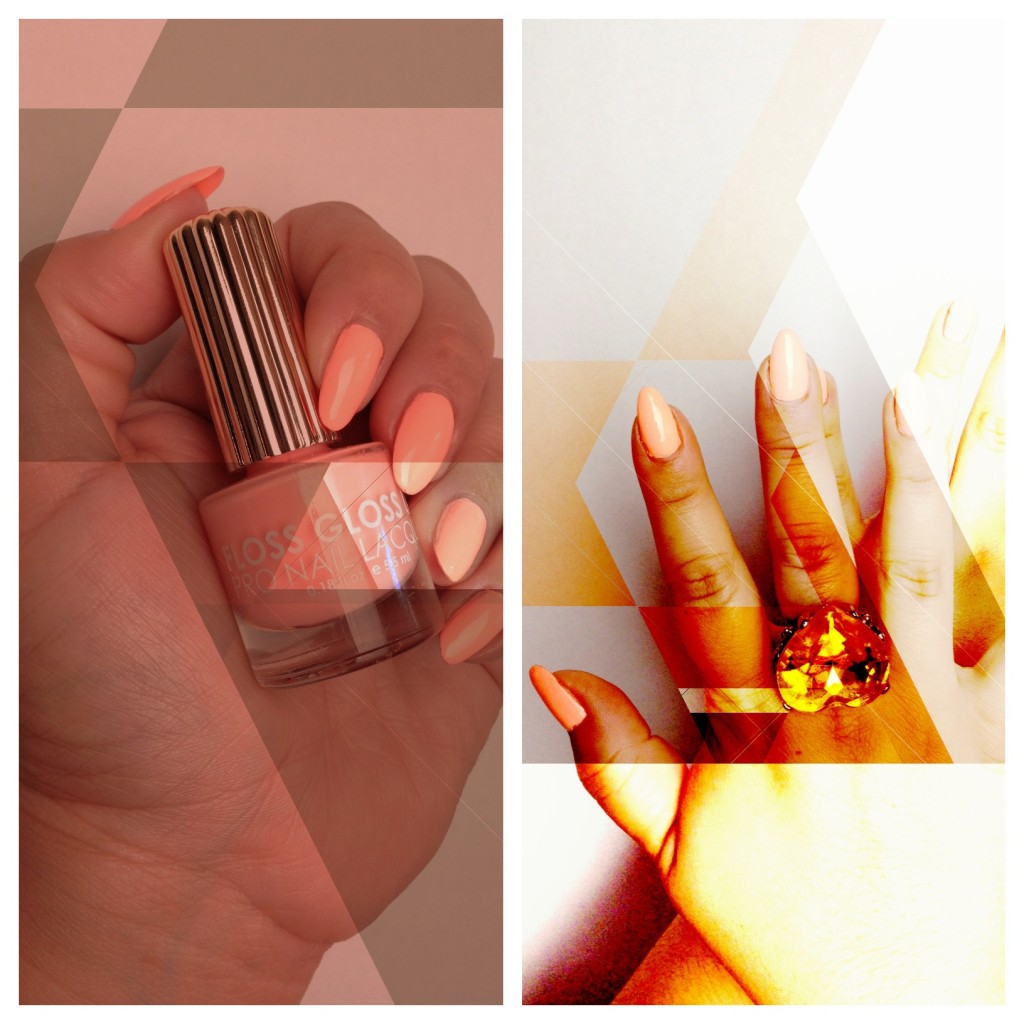
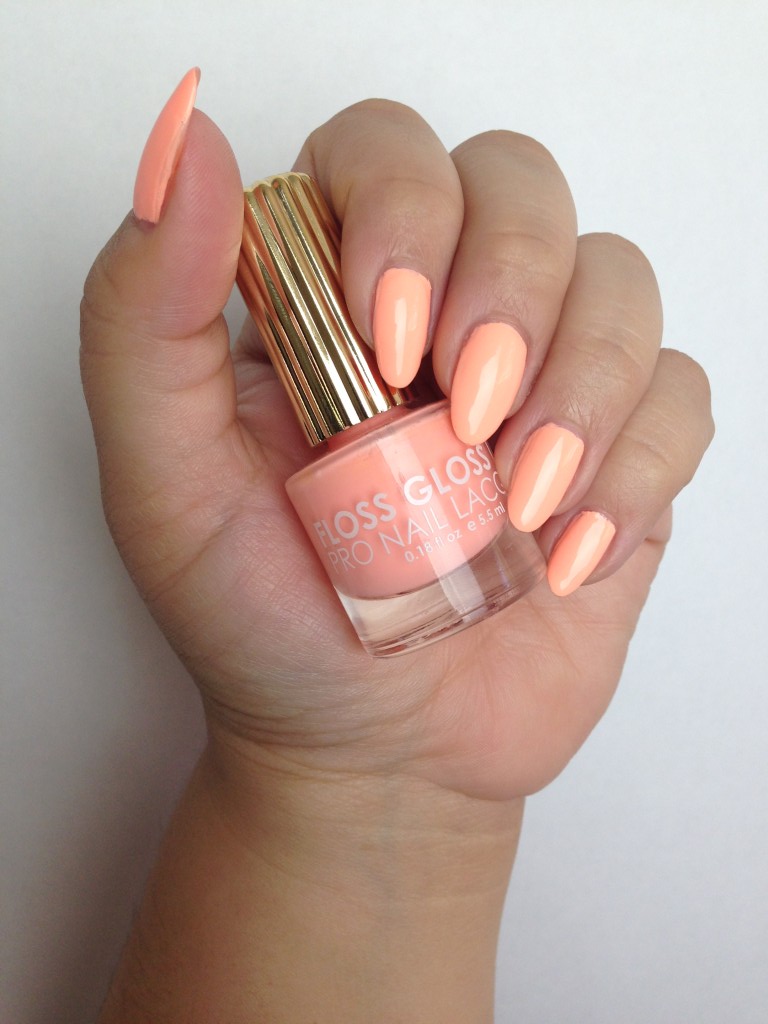
Floss Gloss Lacquer in Pony

flossglosspony

Pony, Floss Gloss, $8

Floss Gloss is really good at introducing colors I didn’t know I desperately needed. Neon peach is not a color I would have considered for myself before I got Pony, but I’ve fallen in love with it.
flossglosspony2

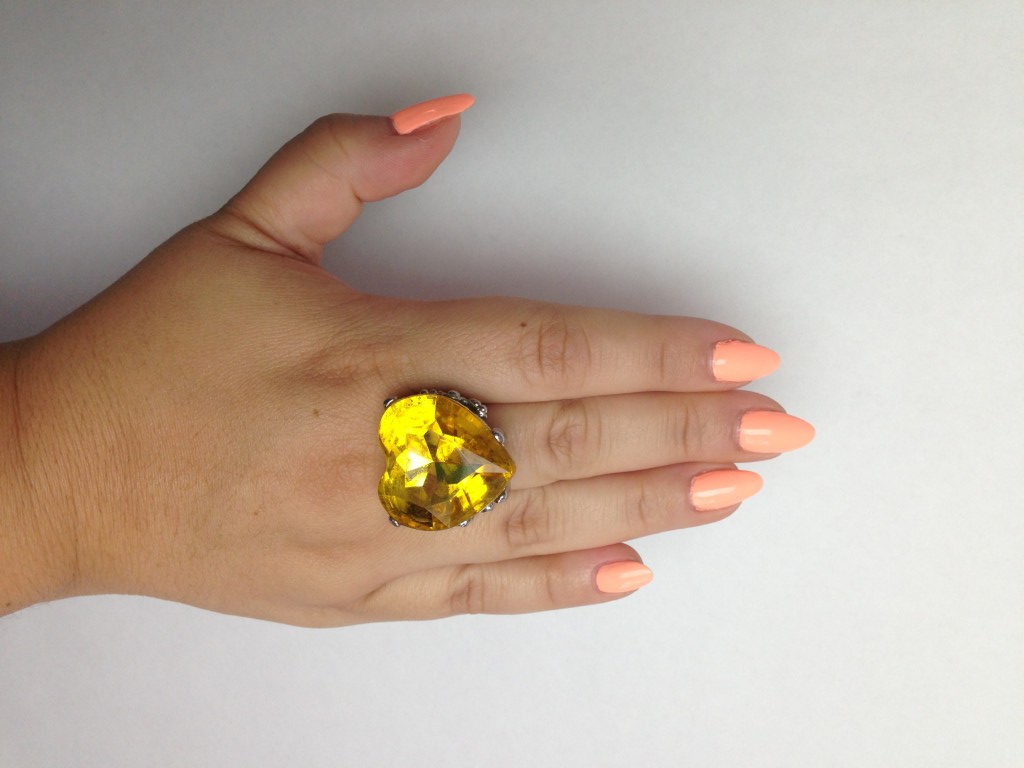
What are you, kidding me? How hot is this?! It’s apt the color is called Pony because it’s amazingly sexy and it reminds me of one of the horniest songs of all time, “Pony” by Ginuwine. A hot thing to do, would be to dance a sexy striptease to “Pony” while you run your Pony tipped fingers all over your sexxxay boddday. BAM. Unstoppable.

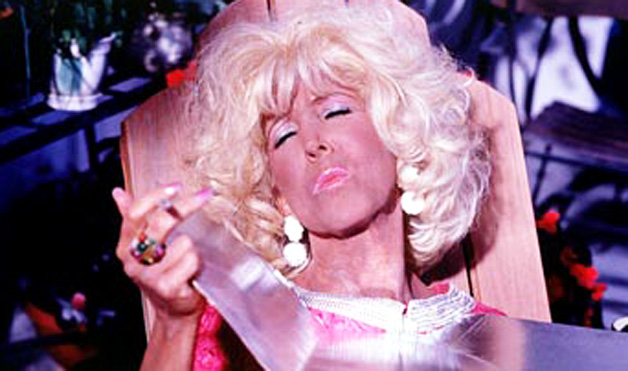
This color make me look super tan, and it gives me, what I like to call, DIVA HANDS or LADY HANDS. Like Babs.
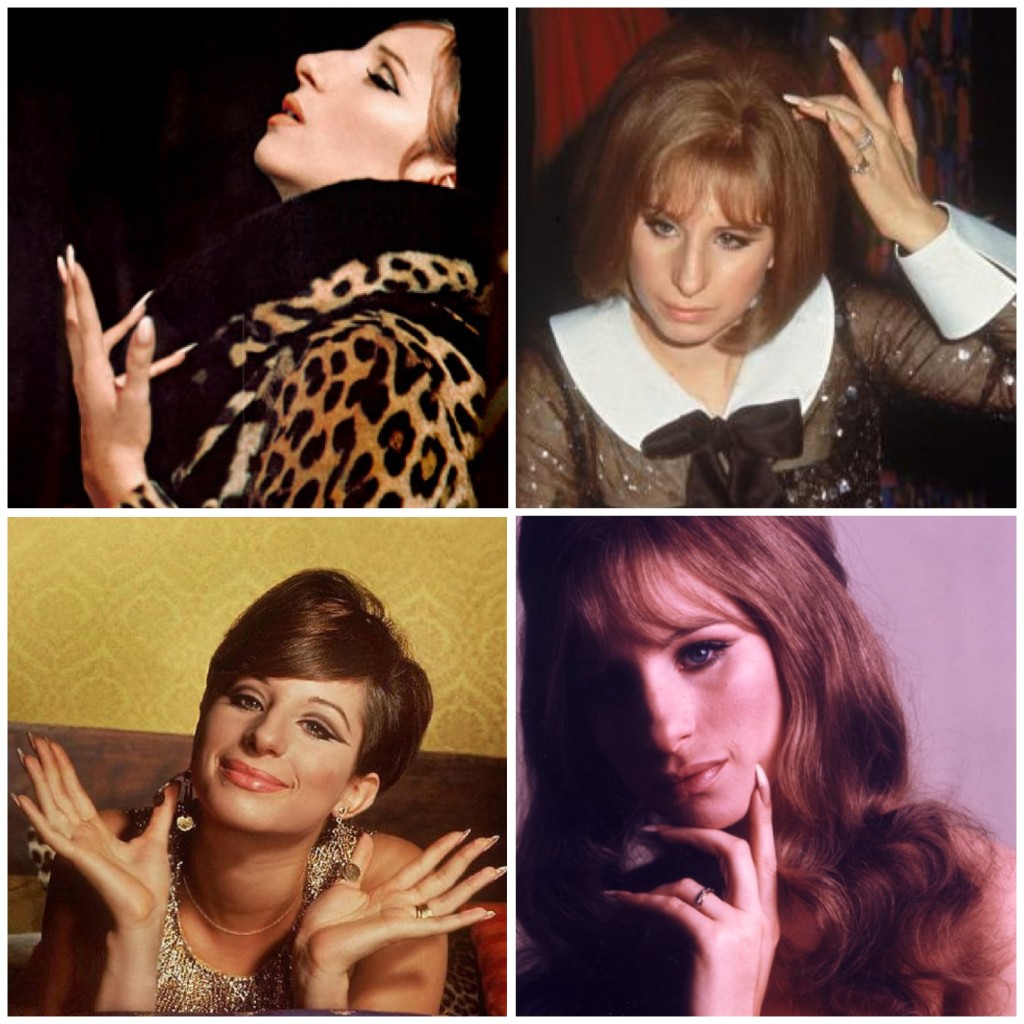
babsnails

OG DIVA NAILS

This is my third bottle of Floss Gloss polish. I’ve been wearing their colors, exclusively, for almost a month, and they’re all great. Combined with my base and top coats, I’ve gotten at least a week’s wear, without chipping, from each bottle. I really appreciate that, especially since chips are so much more obvious on bright colors. I’ve also noticed that, during all three manicures, I thought I messed up the wet polish enough to warrant removal and re-polishing, but by the time I’d finish the top coat on the rest of my fingers, that bumped, smeared, or otherwise gooped up nail would have leveled itself out to the point that I could just put on top coat and everything was perfect.

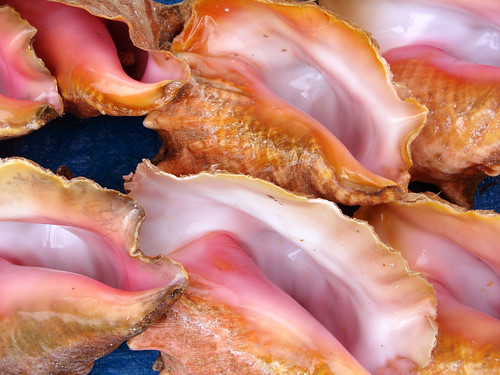
My camera couldn’t do this color justice. In some light it was brighter and orangey, in some light it was a soft pink, in photos, it was more nude. All week, I’ve been wracking my brain, trying to remember where I’d seen this color before.

Last night, it finally hit me.

Conch

All the shades I’ve seen in Pony, you can see here.

WHEW! THANK GAWD I was able to nail it down. It was driving me crazy!

Besides being dope as hell, Pony is just flat out pretty. I actually had the thought to myself that I wished I could go back in time and wear it at my wedding.

I’m legitimately sad to have to take this polish off to swatch another color.

Buy it HERE.

Standard
Face, Links

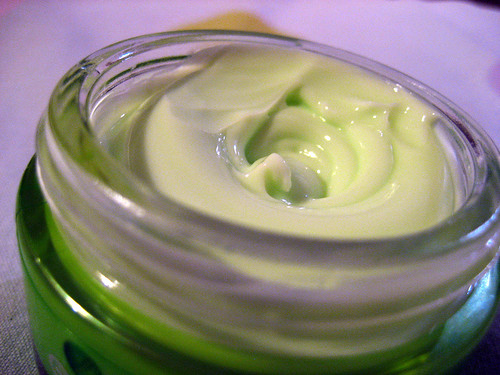
The Right Way to Apply Skin Cream

beauty ~ only skin deep?

This article about the right product order for your skincare routine is really informative! If we’re going to pin all our hopes on these serums and potions, we should at least put them on in a way that will let them work to their best potential. Otherwise, what? Just staple cash to my wrinkles and call it the same thing?

Standard
Maintenance, Nails

ASP Nail Wrap Kit

Did you guys know you could patch a torn natural nail? I didn’t. All these years, I’ve been breaking one nail and then mournfully cutting off the other nine. Finding out now that things could have been different all along, well….it smarts. Growing out your nails is hard work! You can’t open soda cans, umm, you have to wear rubber gloves when you wash dishes, you have to be careful opening doors and stuff. Like I said, hard work!

Almost 2 weeks ago, I found a little tear in one of my nails. It was the kind that was up in the pink, so you know it’s bad. Not only are you going to lose your nail with one of those tears, but it’s going to hurt like a mother in the process. Then, you have to deal with that soft, pink, nail bed. It’s like a turtle without a shell! Just all exposed and sad. I’ve been growing out these nails since my white manicure, and I was not going to let them go without a fight. After a little internet sleuthing, some television, maybe a nosh, I headed for the Sally Beauty closest to my house to see what I could work up.

SIDE NOTE: Do you guys dislike going to Sally like I do? Maybe it’s because I usually beauty supply shop in the pro shops (ASSHOLE ALERT), but the Sally stores, and most of the girls working in them, are kinda tacky and dated. Am I just a snob?

8ball

Damn.

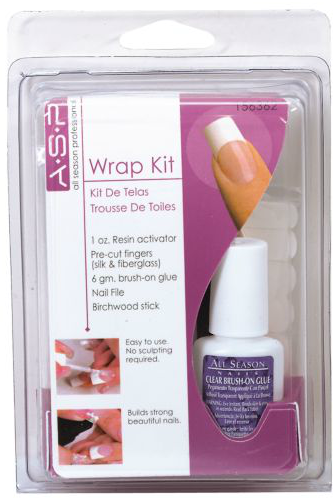
During my investigative process, I found people saying you could fix a nail with fiberglass nail wraps and nail glue. So, at the beauty supply, I ended up buying this ASP Nail Wrap Kit. I *think* it’s for doing at home acrylics, but it has everything in it, besides alcohol, you’d need to do a nail repair.

Screen Shot 2013-06-24 at 9.47.15 AM

ASP Nail Wrap Kit, Sally Beauty, $14.99-$16.99

This is so, so, so easy. Stupid easy. You’ll be shocked!

First things first, gather up your supplies. Besides the kit, you’ll need little scissors, tweezers, rubbing alcohol, cotton balls, a paper towel, a plastic shopping bag, and a nail buffer. I use this buffer.

This particular kit comes with “resin activator” whatever that is. I didn’t show you those steps, because I don’t think they’re necessary. You could just buy nail glue and fiberglass nail wraps to do this if you don’t want to get the kit.

The only pre-steps warnings I have are these: DO NOT touch your nail with your other fingers after you’ve cleaned it. Be careful not to touch the wraps themselves too much too. You really don’t want any finger oils compromising your patch. AND, the paper towel is for under your work area. Come on, be responsible. Don’t flick nail glue all over your table.

Last warning: pee first. That’s good advice for all nail work right thurr.

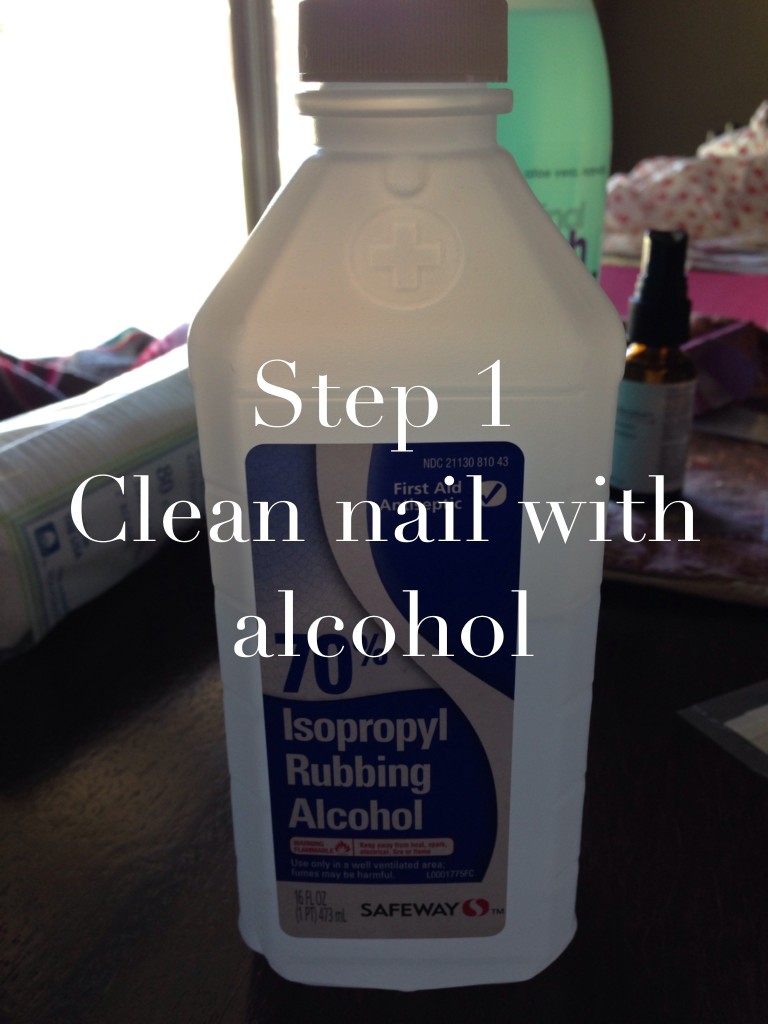
nailfix1

This part is so important. You have to remove any oil from your nail, or the patch won’t take. Clean your nail in the direction of the tear, so you don’t make it worse.

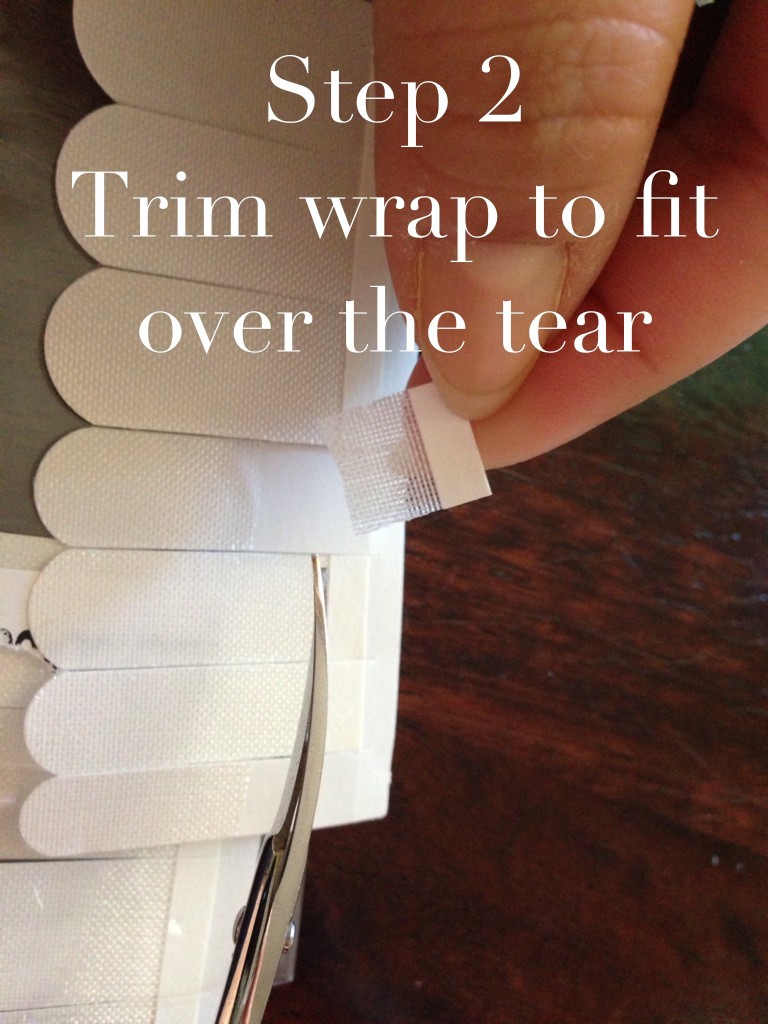
nailfix2

Trim just enough to cover a little past the tear, and enough to wrap under if you can.

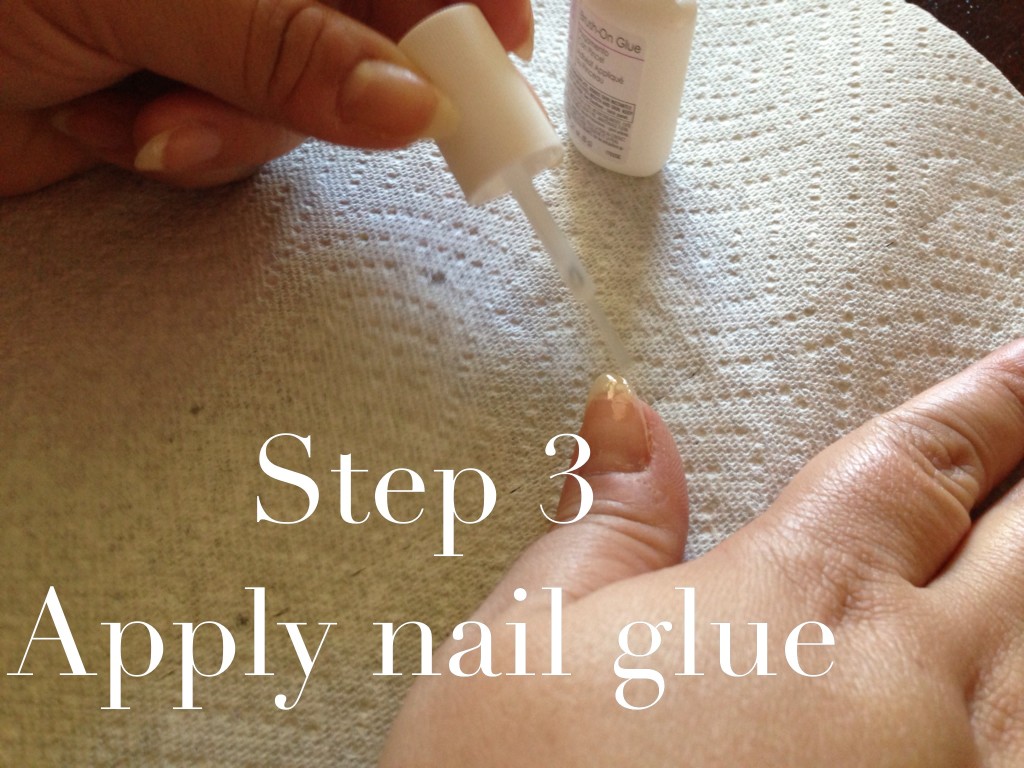
nailfix3

I didn’t put it on my entire nail, just the area with the tear.

nailfix4

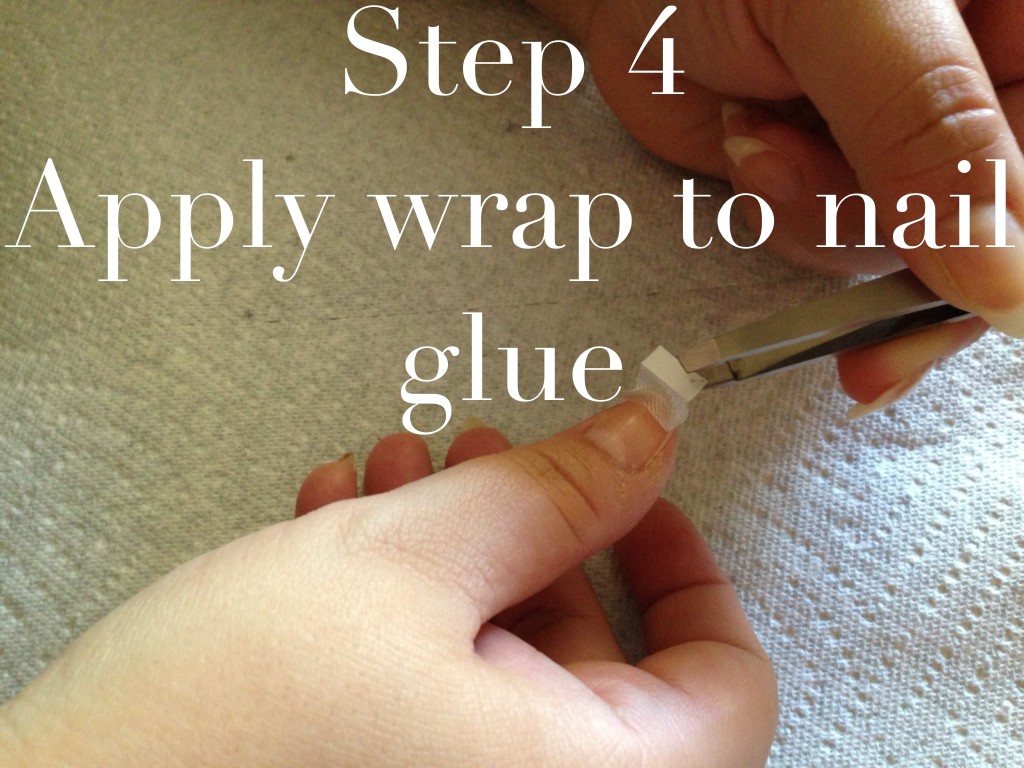
Use your tweezers to carefully place the wrap. Don’t use your fingers. Oils!

nailfix5

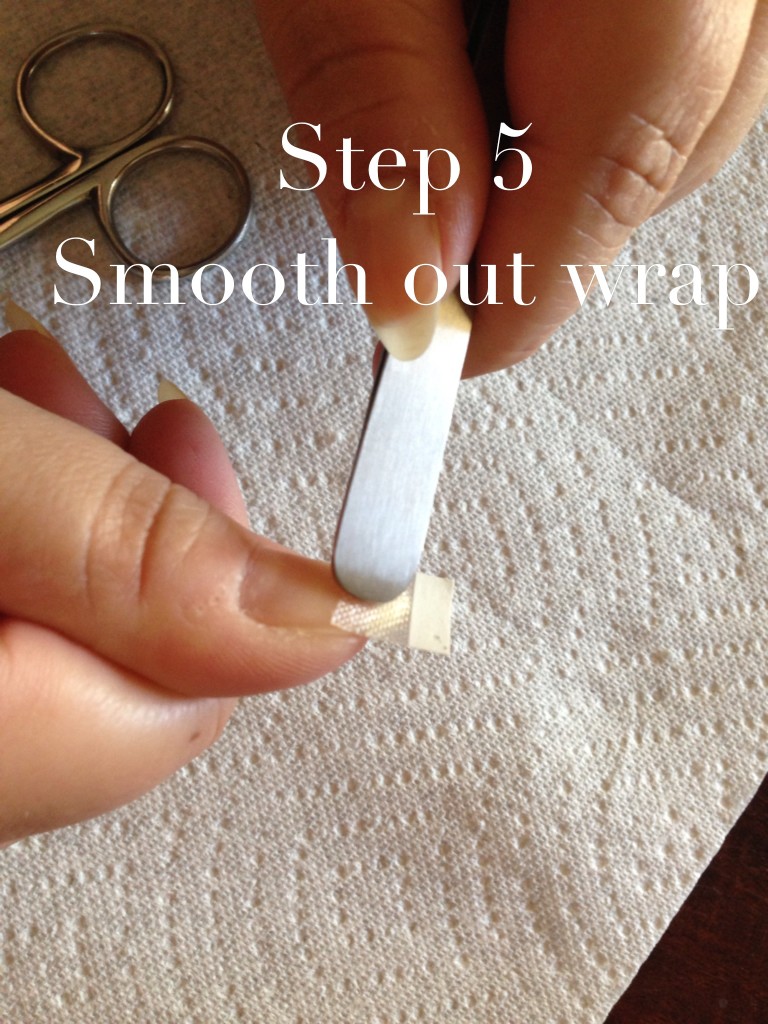
Using your finger inside the plastic bag, or the round end of your tweezers, smooth out the wrap.

nailfix6

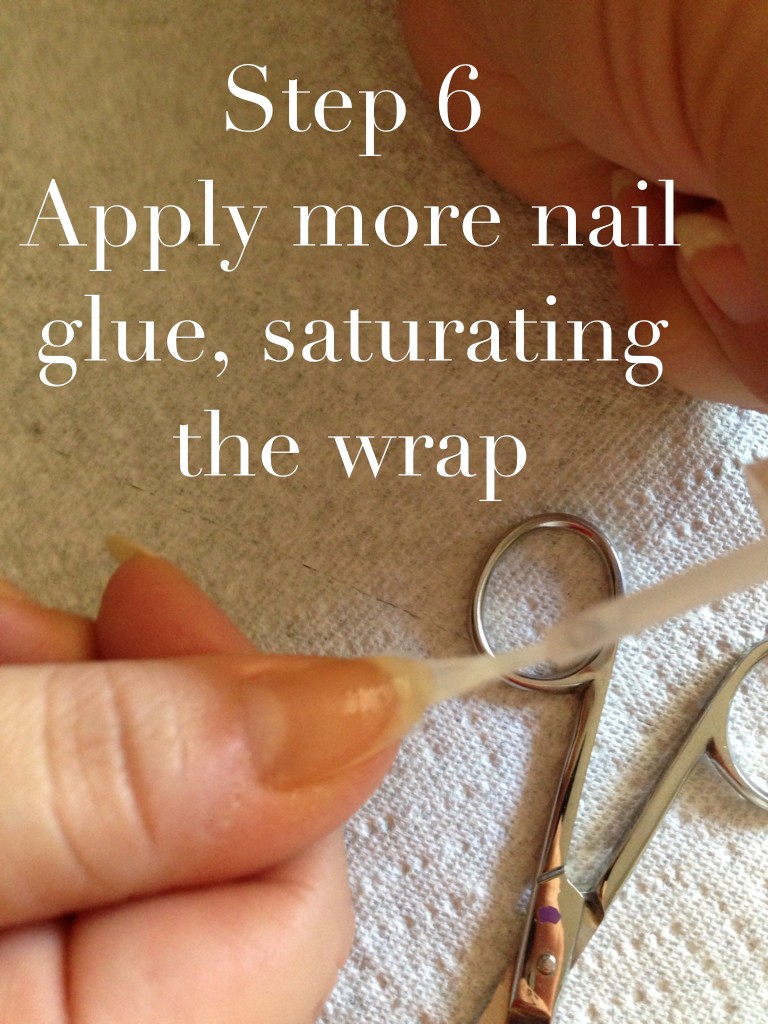
Don’t glob it on, but be sure the wrap is fully saturated and smooth on the nail.

nailfix7

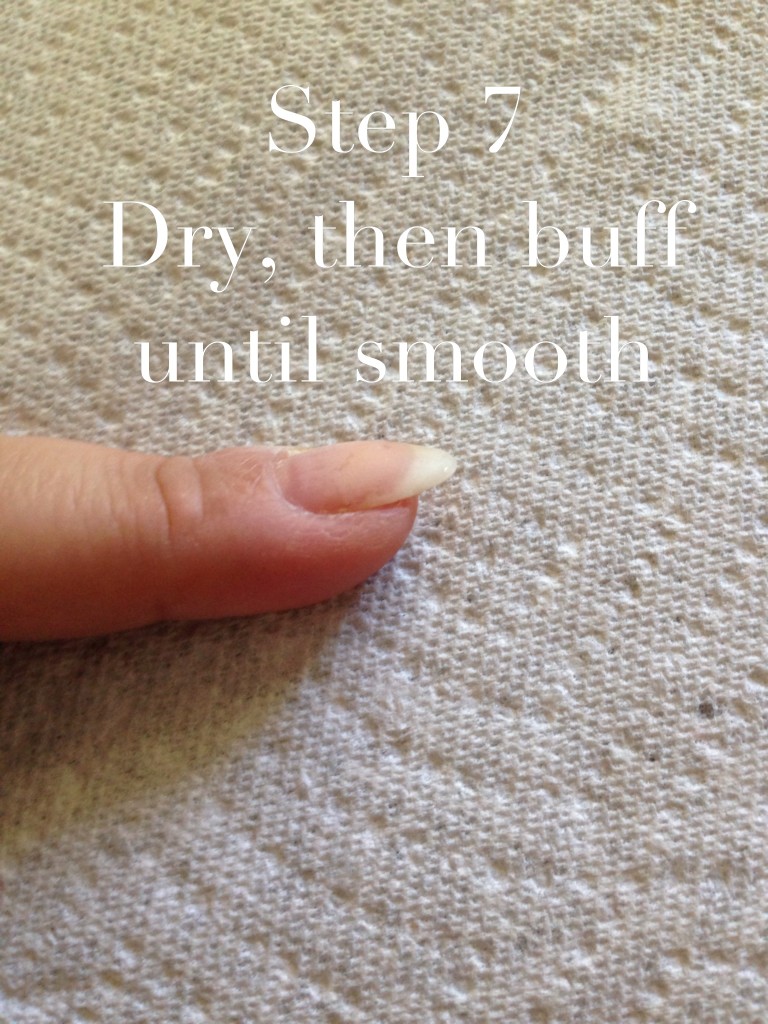
When the glue is dry, about 15 minutes, using a nail buffer, buff the nail until all the shiny spots are gone.

And that’s it! It might seem like a lot of work, but once you get the hang of it, not counting drying time, it took me maybe 2 minutes per nail. Way less time than it takes me to trim and shape all ten nails, and way less time than it takes to grow out a new one. I’ve had 2 patches on for nearly two weeks, and they don’t show any signs of lifting, peeling, or failing. My patched nails are all still intact, and under polish, you can’t even tell they’re there. Even without polish, you can’t really see the wraps.

Isn’t this so exciting? This is a whole new innovation for me. Nail repair! The way of the future!


Standard
Beauty Tools, Face

Brush Up, Part 3

AKA THE BRUSHENING.

Ok. We’ve covered all the basic brush essentials, and now we’re going to get into some brushes that aren’t necessary if you’re a meat and potatoes kind of makeup person. If you are, I don’t know what you’re doing here. I deal in excess, honey. Always, always, por vida.

These last three tools don’t come out for every face, but they always make an appearance for a going out face, or a photo face. I don’t highlight and contour to go to Target, I can barely manage to convince myself to put a bra on.

RELATED: Yesterday, I went to Starbucks at 7:00 AM without a bra on, but nobody could tell because I kept my arms crossed over my nips. Pretty smart, huh? Nobody every knew what I had under there.

Yuck. I can’t stop thinking about meat and potatoes makeup.

Let’s go.

brushhighlight

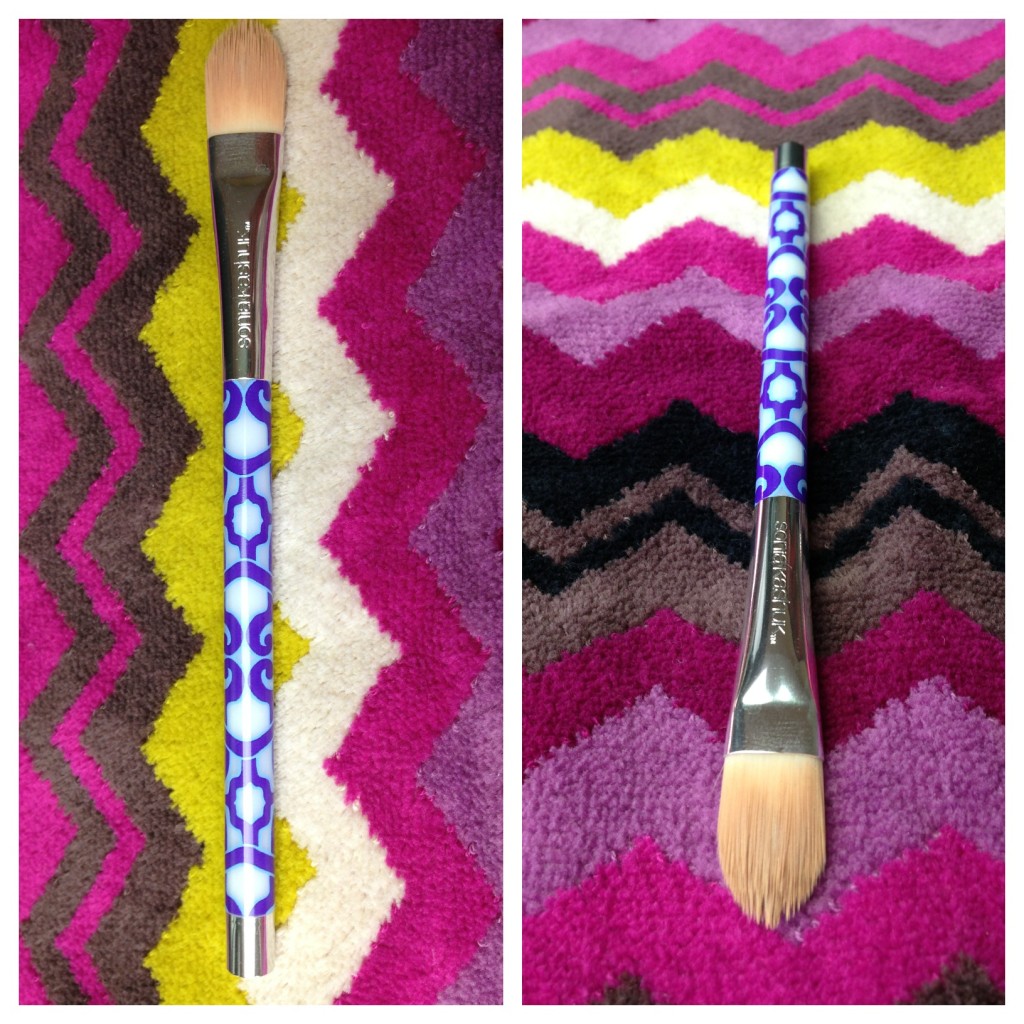
Sonia Kashuk Concealer Brush, Target

I love this brush for precision concealing and highlighting. The pointed tip makes it so much easier to get in the small areas under eyes, and the nose.

Like I said, I don’t always use highlighting, but when I do, working with product off the back of my hand, I highlight around the eyes, down the center of the nose, chin, and sometimes above the mouth. You use highlighter on and around the things you want to accentuate, to bring attention to them and make them more prominent.

This brush also came out of a set, but this Sonia Kashuk foundation brush would do the same job.

brushhighlightpowder

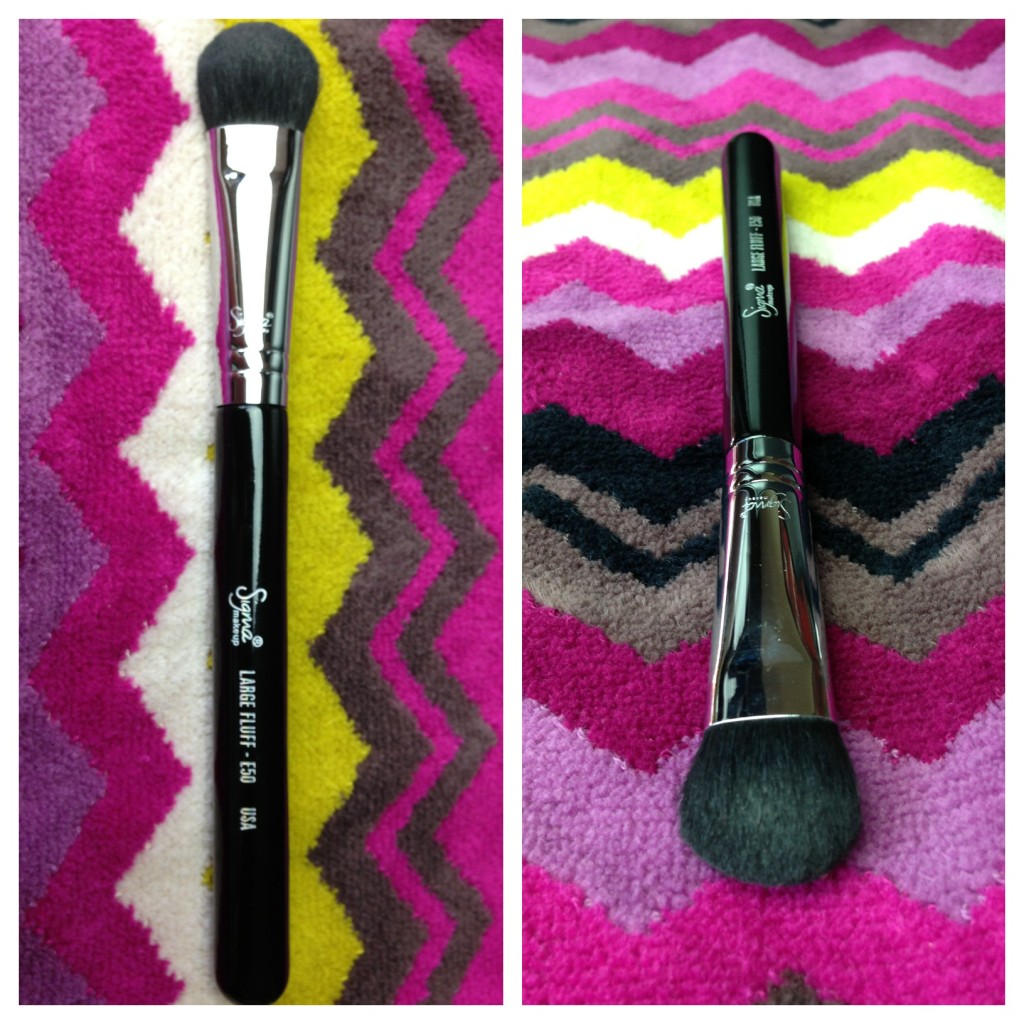
Sigma Beauty, Large Fluff E50, $12

Never  walk away from your makeup without dusting powder over concealer or highlighter colors. It’s the law. And you, my friend, are not above the law. What do you want? Dusted or busted? Don’t get busted or you’ll get thrown in beauty jail. You and other beauty offenders (eyebrow manglers, hair crunchers, felony non-moisturizers, and repeat dick wagglers [regular jail was full, beauty jail is coed]) will be behind bars, and don’t bother having someone bake a cake with a file in it, they know all about that.

I use this brush to stay out of beauty jail. A light brush of translucent finishing powder makes your concealer smoother and keeps it in place.

brushbeautyblender

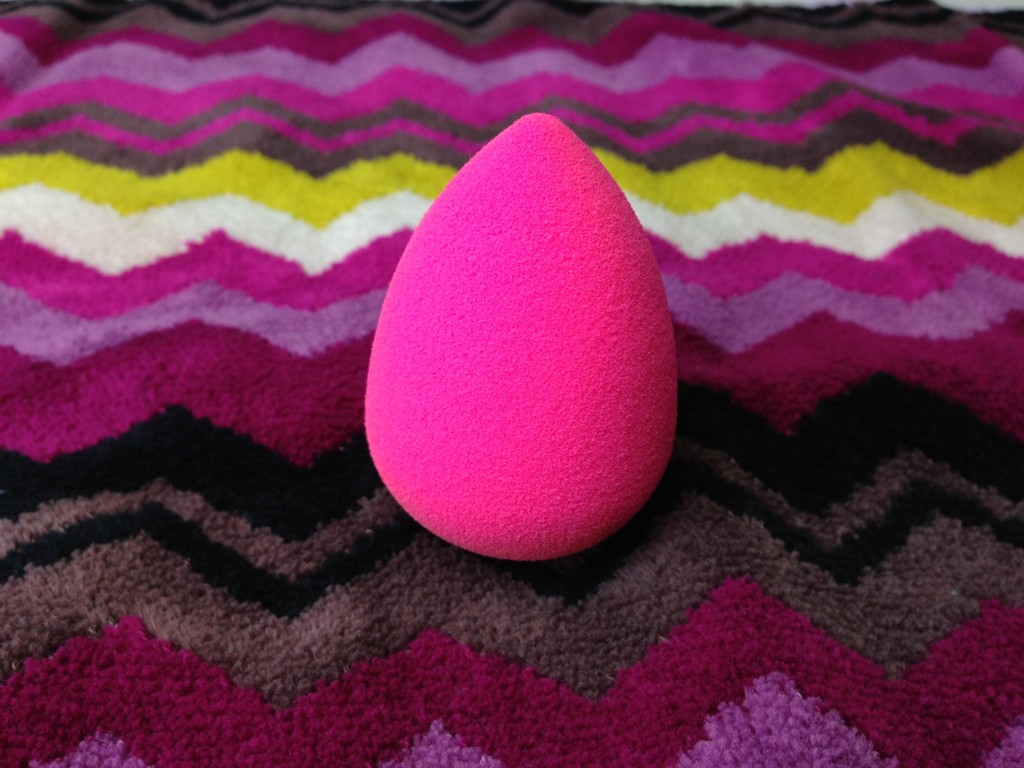
Beautyblender, Amazon, 2 for $21.47

I love everything about this little tool. It’s adorable, it feels good in my hand, and it works beautifully. You can use it dry or damp to apply foundation or blend, I prefer to use it damp. Using it to apply foundation gives a soft, smooth, and almost airbrushed finish; while the dampness of the sponge stretches your cosmetics and gives great build-able coverage. I sometimes use it damp, with no makeup, to press over my finished face and blend any edges or lines that may still be present from contouring and give everything a seamless look.

The name brand BeautyBlenders are kind of expensive, and they do sell similar sponges at Sephora and Target, but I can’t vouch for them. They’re just sponges, right? What’s going to happen? They blow up?

*****

I hope everyone found this series helpful! Good brushes can come from all kinds of different places. I have and use brushes that came from makeup counters, drugstores, and art supply stores, just keep an eye out and you’ll curate a great collection too.

Are there any brushes or tools you’re curious about or any problems you’re having with current brushes? Does everyone know about washing their brushes, or would that be helpful too? Let me know!

And hey, don’t forget about God’s makeup brushes: your fingers. Just keep those washed too, ok? Maybe more frequently than your actual brushes.

Standard
Personal, Skincare

Brown Bunny

Like that boring porno movie.

And also like, all of a sudden, I want to tan!

It’s so unusual, and SO BAD. What am I doing? I’ve basically spent the last 20 years under an impenetrable layer of sunblock, and now I’m sprawling out, liberally oiled, under an afternoon sun.

It’s so weird.

I just want caramel thighs and cocoa bunz, maybe some sun-kissed shoulders. Doesn’t that all sound so sexual? And sort of delicious?

How did I go from being so pale I was literally sort of blue, to wanting to be a bronzed sun goddess? Not very goth, SARAH.

magda

Looking good!

I won’t fake tan because of laziness, and because I’m not sure they make a Tan Towel big enough to tan my ass. Tan Beach Towel maybe? **Note to self: TAN BEACH TOWEL? COULD BE BIG $$$?**  Plus, fake tanning doesn’t feel half as awesome as real tanning. Blanket, grass, chi, music, sunshine, NAPS?! All better than slipping a disc trying to tan the backs of my knees with can tan. Basically, the only thing fake tanning has on real tanning is, I don’t have to watch for neighbors booty peepin’ over the fence.

wilson

This guy knows what I’m talkin’ about.

So what then? Am I doomed to resign myself to a life of fish belly thighs, or do I get under that sun and keep an eye on my moles? Am I wrong and is Jason right about exactly what kind of Vitamin D deficiency I might have?

We all know it’s completely stupid to be out in the sun like that, but how do you fight the lure of that warm blanket? Why do otherwise sane people say “fuck it” to the dangers of tanning? I was just going to say I don’t want my moles to grow from the sun and take over my whole body, but then, I guess I’d at least be uniformly brown.

Standard
Birchbox

Birchbox is imminent!

I got an email from Birchbox with a tracking number and a preview video! AUGH. TEASE.

Did you see that the Origins Charcoal Mask was one of the products shown? I was *just* talking about that! SPOOKY!

$10 a month for those samples and products is a pretty good deal. I think next month I’ll try not to peek at the video, then, when my Birchbox comes, it will be like beauty Christmas!

Sign up HERE. They have man boxes too. I don’t know what you get in those? Porno and Slim Jims, probably.

Standard
Beauty Tools, Eyeshadow

Brush Up, Part 2

I hope everyone enjoyed the first post about brushes yesterday. I realized way too late that I should have cleaned all the makeup off them before taking pictures. Oh well.

brusheyes

  I did this. With these brushes and some liner. Maybe some spit. 

Don’t use spit to fix your makeup mistakes. That’s really bad. The enzymes in your saliva that break down food will go to work on your skin. Gross! That tip was extra. *WINK*

Everyone pumped for some eye and lash tools?! Enjoy more photos of my dirty brushes!

Y’ALL READY FOR THIS?!

brushroundshadow

Sephora, N/A

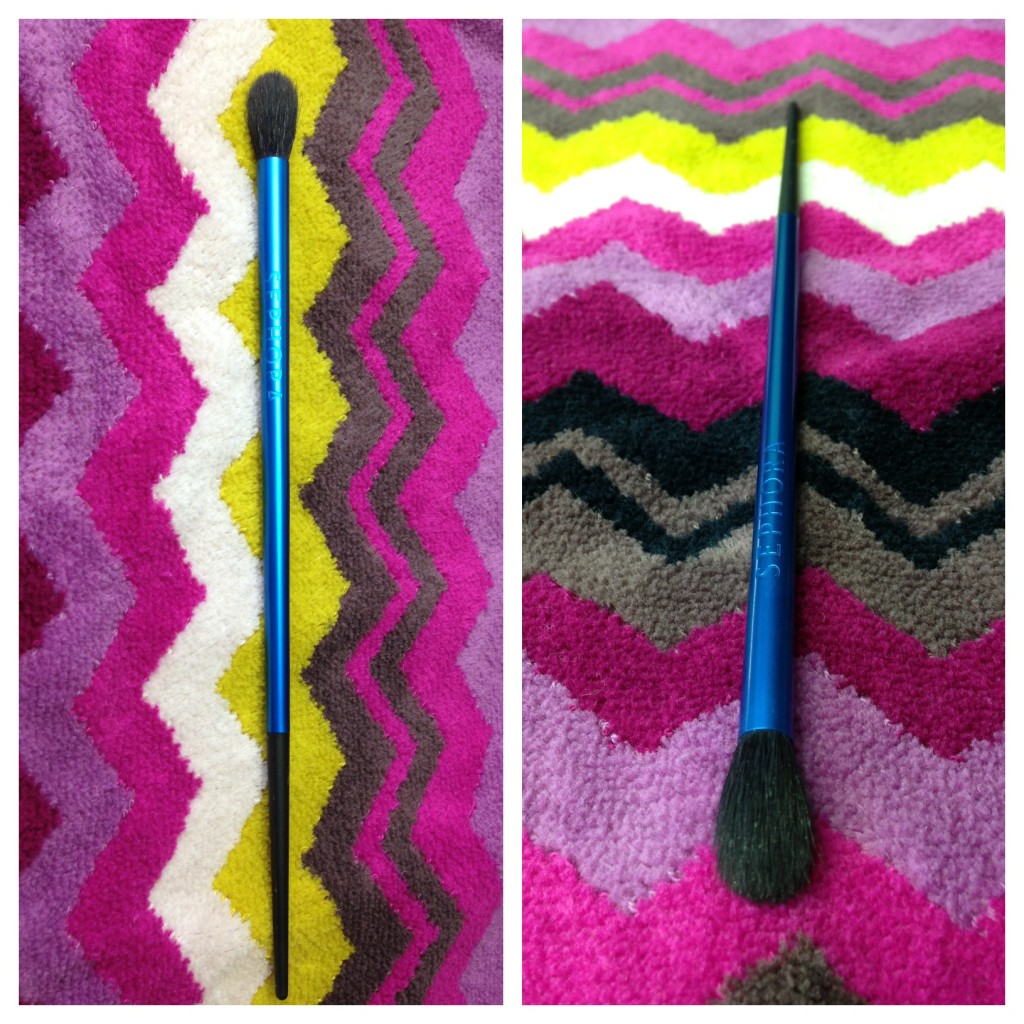
Great. Another brush that doesn’t appear to exist anymore. Good opener, Sarah! That’s ok. Serenity now. This brush is technically a crease brush, but it pulls double duty most days; applying base color and then blending crease colors. The rounded end is good for getting into the eye crease, and the fluffy bristles are great for picking up a lot of color to wash over large areas, or blending to finish. Sephora has THIS brush on sale right now. It looks like it’s similar, and it’s only $6.

brushcrease

Sonia Kashuk Medium Eye Shadow Brush, Target, $5.99

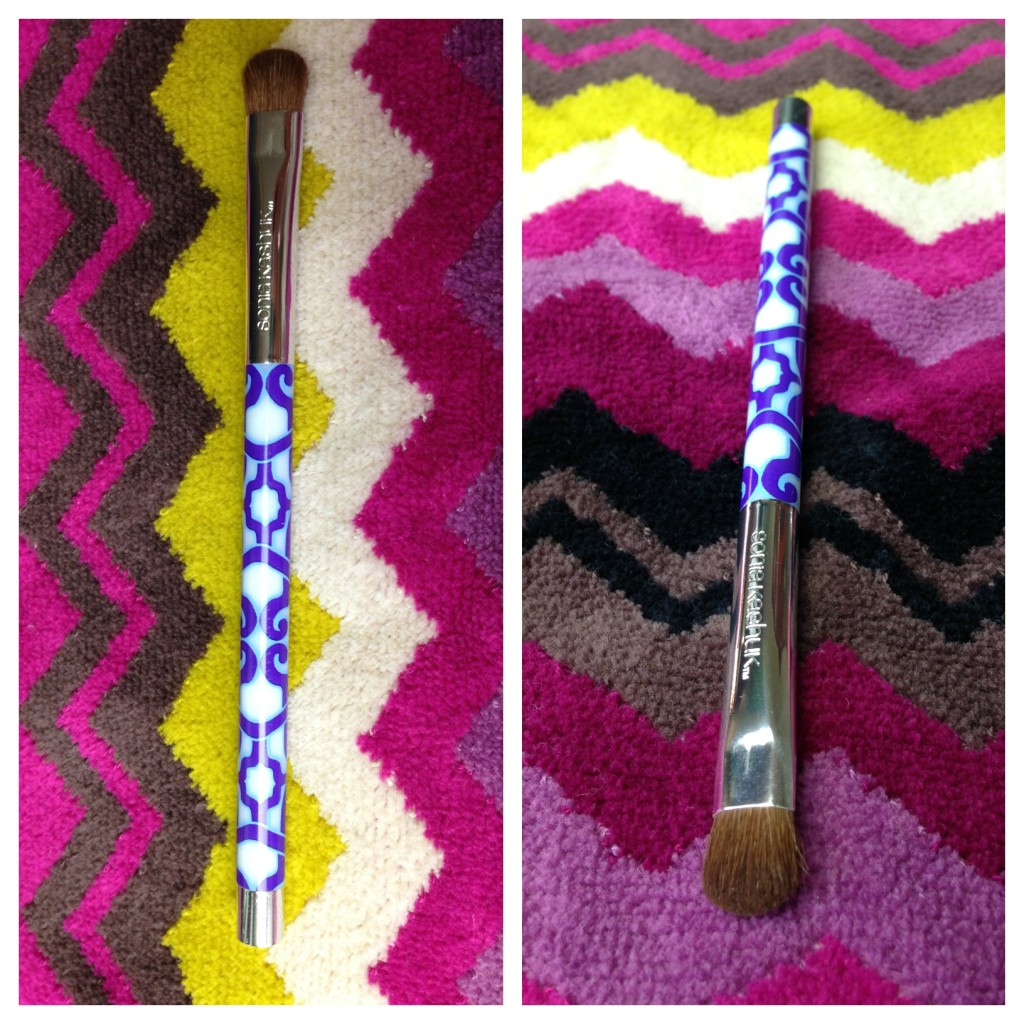
I bought this brush as part of a set. Like, the brush above, I use this one for detail work and large areas. It’s flat, so it’s great for making a really defined crease, packing color into inner and outer corners, and brushing shadow under your eye. This brush is the same brush, with a different handle. If you don’t have a lot of eye makeup brushes, or if you aren’t sure how to start pulling together a set, this brush, along with the one above, is a good place to start. Their versatility will get you through a lot of looks.

brusheyebrow

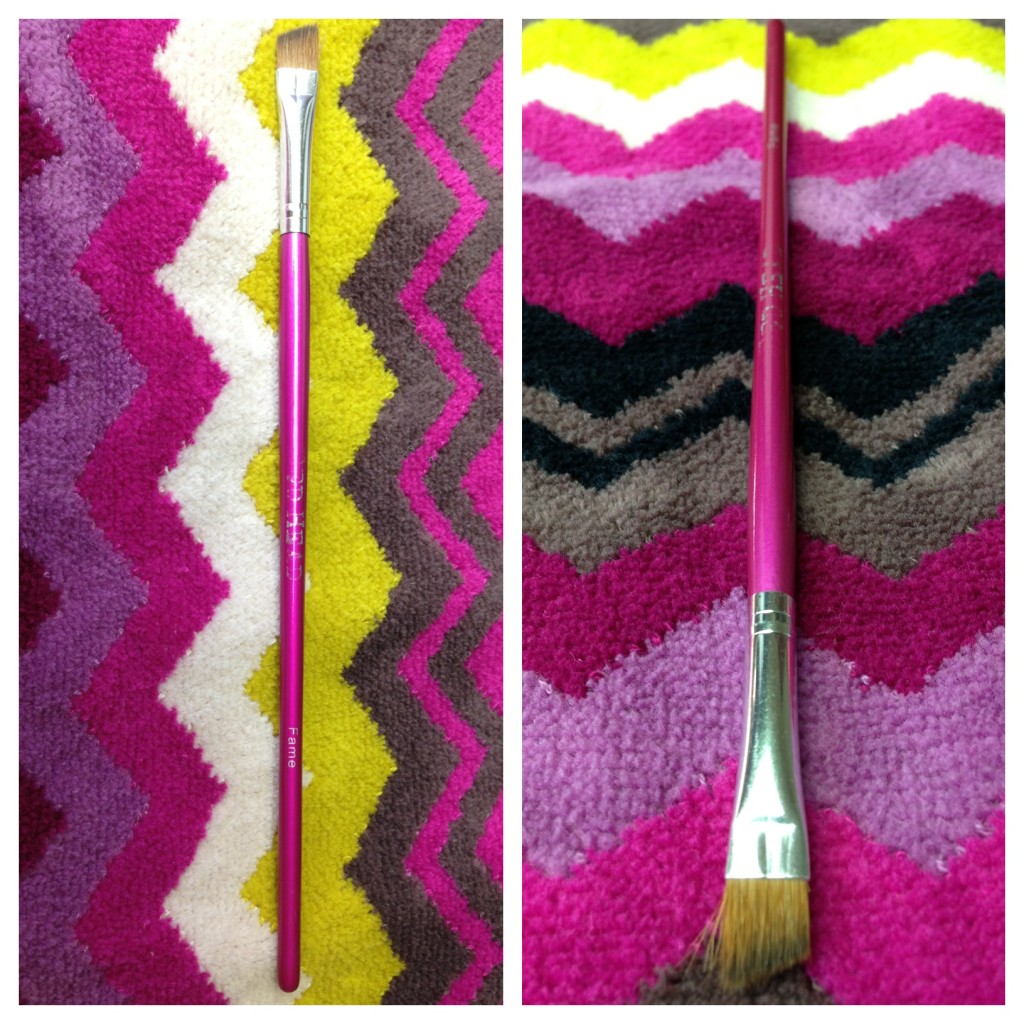
Tigi Angle Brush

This slim little brush has been kicking around with me since I was in beauty school. I’d use it sometimes to layer shadow over liner, but it wasn’t part of the regular roster until I figured out how amazing it was for putting on my eyebrows. I use it with my Anastasia Beverly Hills Brow Powder Duo to make my brows soft and natural looking, or sharp. The tips of the bristles are so thin, you can really make the exact lines you need. I even still use it to really define my liners with shadow, or as a liner brush. It’s really good to have at least one fine, thin brush in your stash. They come in handy all the time!

brushlashbrushandcurler

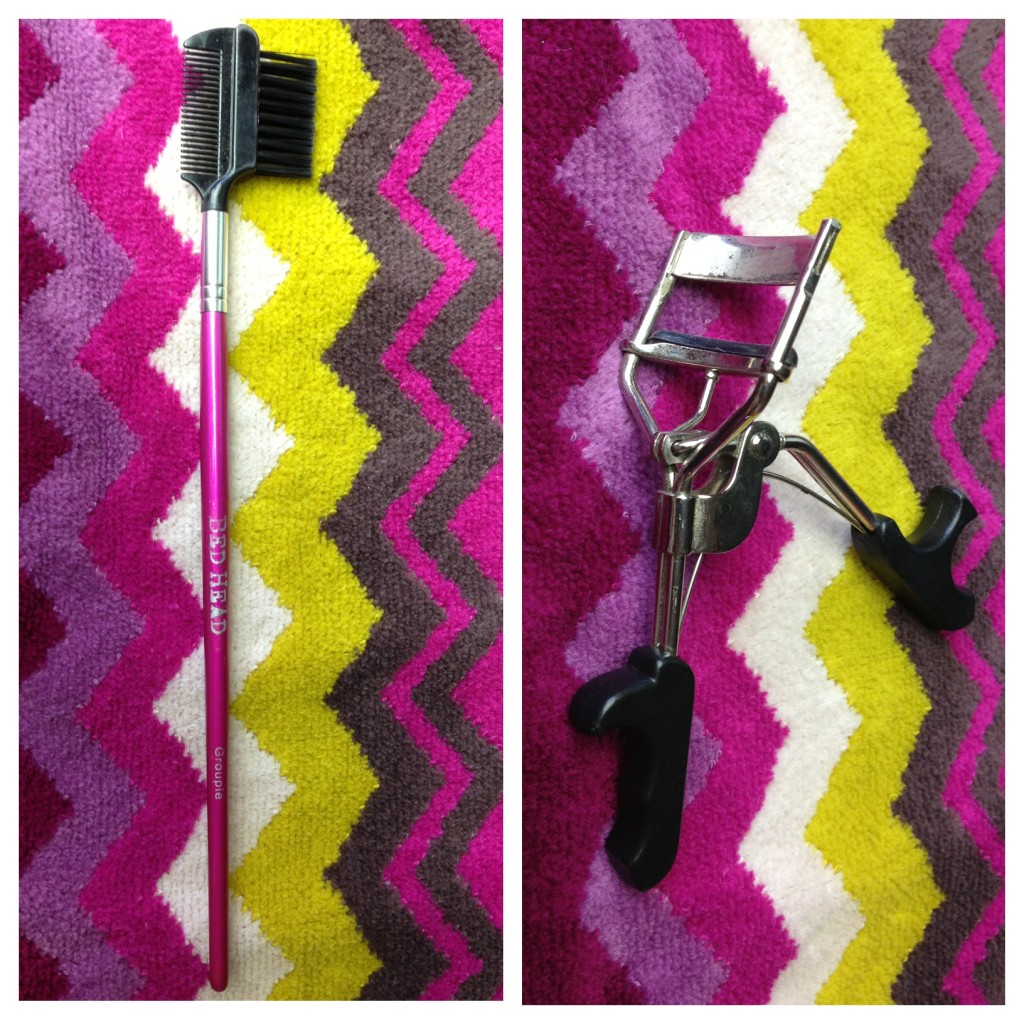
Tigi Brow & Lash Groomer, Amazon, $12.98 & Eyelash Curler, Sephora, $17

Comb for untangling clumpy lashes, brush for softening and taming brows. I don’t think I can explain anymore than that.

I have one weirdo eyelash on each eye that defies all my curling effort, choosing instead to either stick straight out or grow downward into my eyeball. No amount of crimping and poking will make those rebel lashes behave. I usually end up pulling them out with my tweezers. I do not tolerate insubordination. Get in line or get yanked out!

Even if your lashes are actively working against you, like mine, curling is still an important step. Curling your lashes opens up your eyes, and makes your lashes look thicker. When you use your curler, make sure to gradually curl up the length of your entire lash, guiding the shape into a gentle curve; instead of crimping directly at the lash line, which will cause your lashes to go straight up and down.

*****

That’s it for this set of brushes. Look for the last post in this series on Monday; I’m going to talk about some highlighting and blending tools. Look, I’m not going to say it’s going to change your life, but you’ll never know if you don’t show up. Right? Better safe than sorry. That’s what I always say!

Standard
Beauty Tools

Brush Up, Part 1

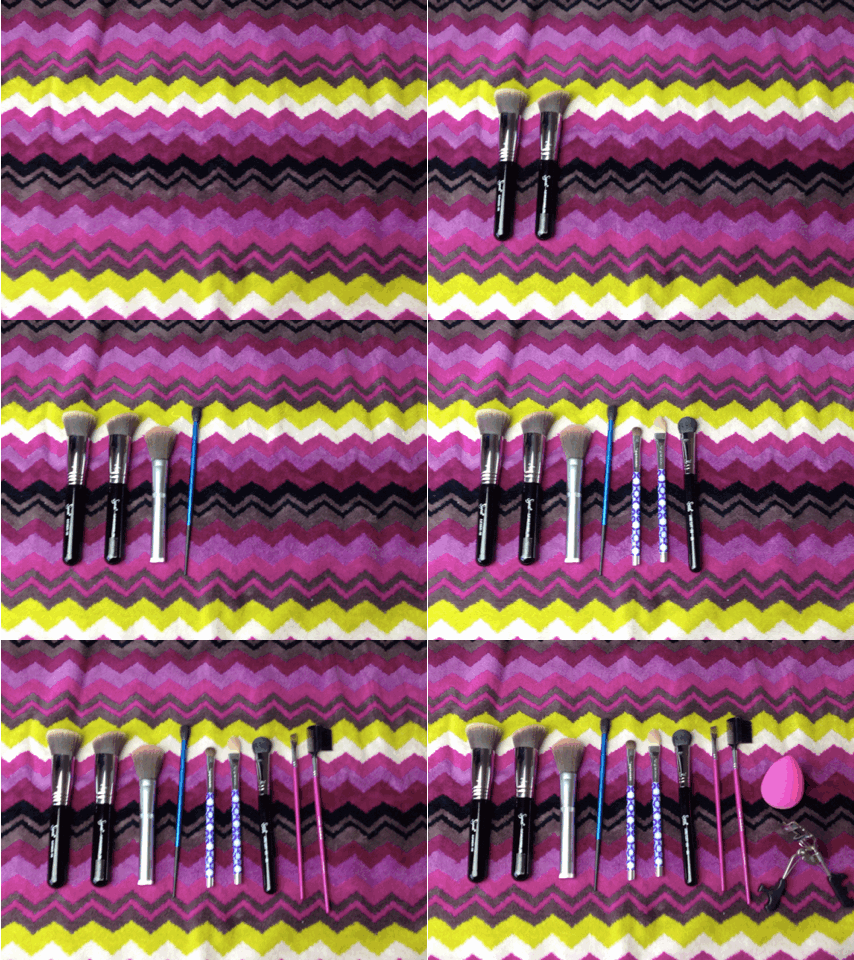
brushesgif

BRUSHES!!!! OTHER STUFF!!!

Isn’t that so hypnotic? Are you getting sleepy? I could stare at it all day. Right now, it’s being scored on my laptop to “Need You Tonight” by INXS and it works great!

I’ve been curating my brush collection for years, and I thought showing you the basics I use for nearly every look, could be helpful. I know I’m always on the lookout for good brushes to add to the pack. I’ve got three entries coming up. We’ll do the regular basics today and tomorrow, and finish the series on Monday with the extra special finishing touches.

Let’s GO!

brushflatkabuki

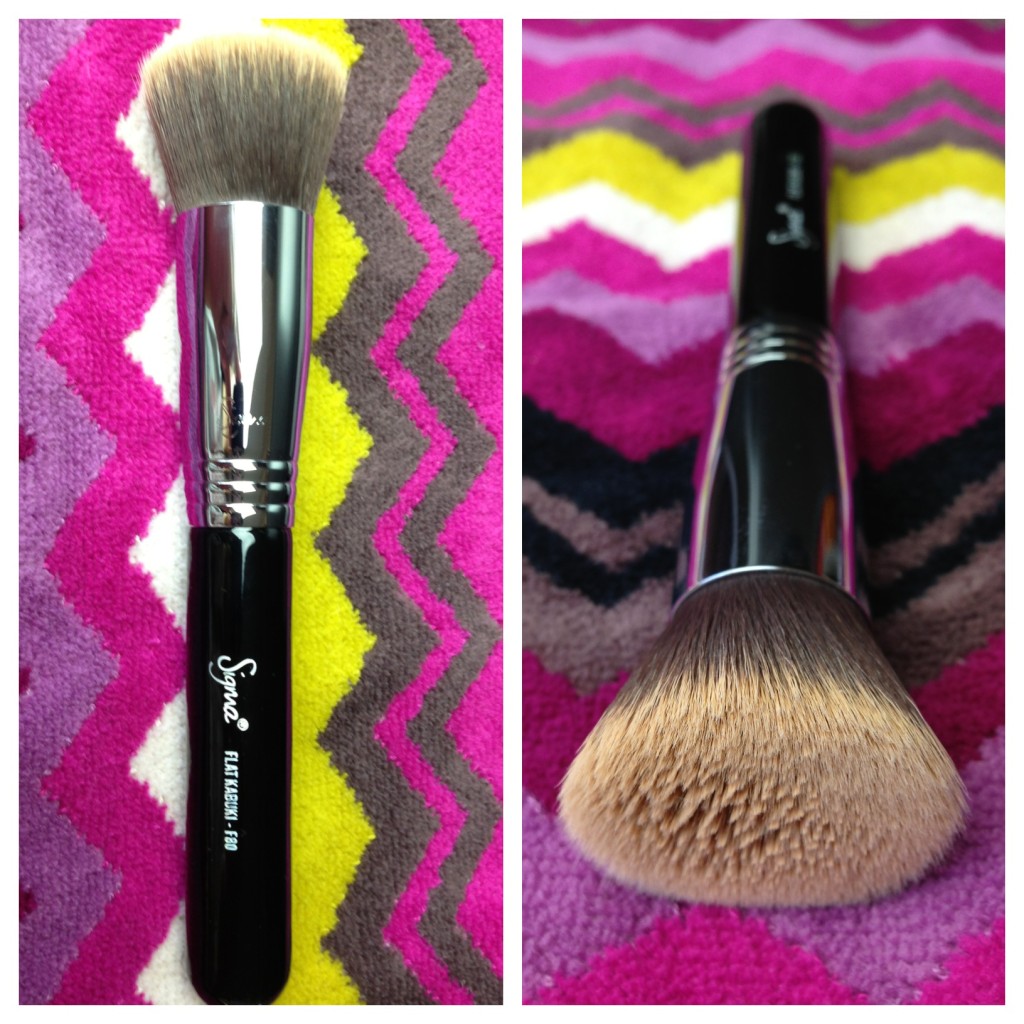
Flat Kabuki Brush F80, Sigma Beauty, $18

Sigma Beauty has really awesome brushes. They’re solid and well made so they feel comfortable in your hand, and the bristles don’t shed all over you. I can’t tell you how many times I’ve walked away from a beauty counter, after letting them put makeup on me, looking like I need a shave and a chest wax.

After moisturizing, this brush is the first step* in my makeup routine. I pump a dab of foundation onto the back of my hand, then use this brush, in a circular motion, to pick up the foundation and buff it onto my face. I apply my foundation from the center out towards my hairline and chin. I also use this brush to clean up any contouring lines.

brushangledkabuki

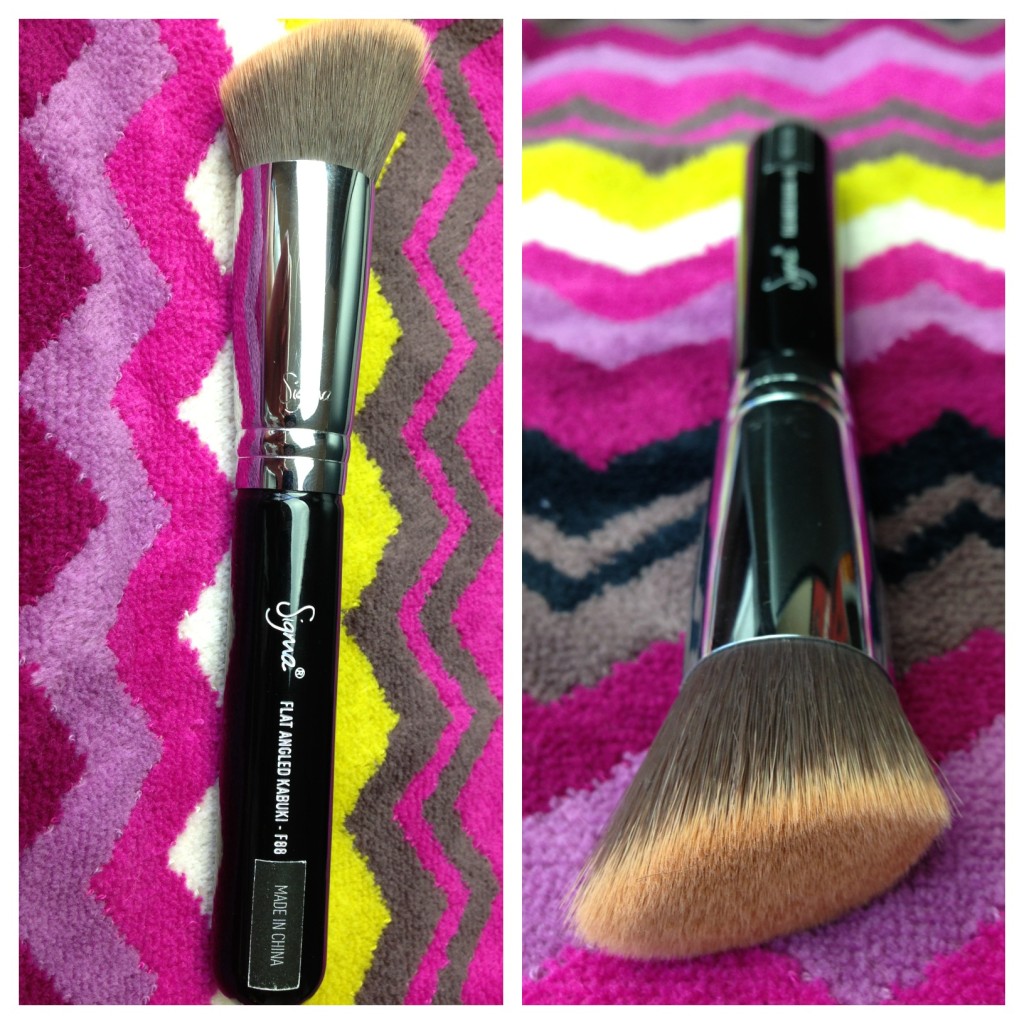
Flat Angled Kabuki Brush F88, Sigma Beauty, $18

This brush is perfect for using with powder or cream bronzer to contour your cheekbones, hairline, jaw and nose. I don’t use it for anything else but contouring, really. I don’t do a ton of contouring in my regular look, but I do my cheeks no matter what. A good rule of thumb for cheekbone contouring is to place the beginning of your contour so it lines up with the top of your ear. For a lot of people, that’s like, right there under your, um, sideburns, I guess? It might adjust up or down a little as you get it to come into line with the top of your ear, but it’s about there. I read the other day that when contouring, to think of your cheek makeup as a bra; the bronzer is the underwire so it gives the most support. You want it to run from next to your ear, under the apple of your cheeks, and end around the outer corner of your eye, being careful not to bring it down too far, that defeats the purpose.

brushblush

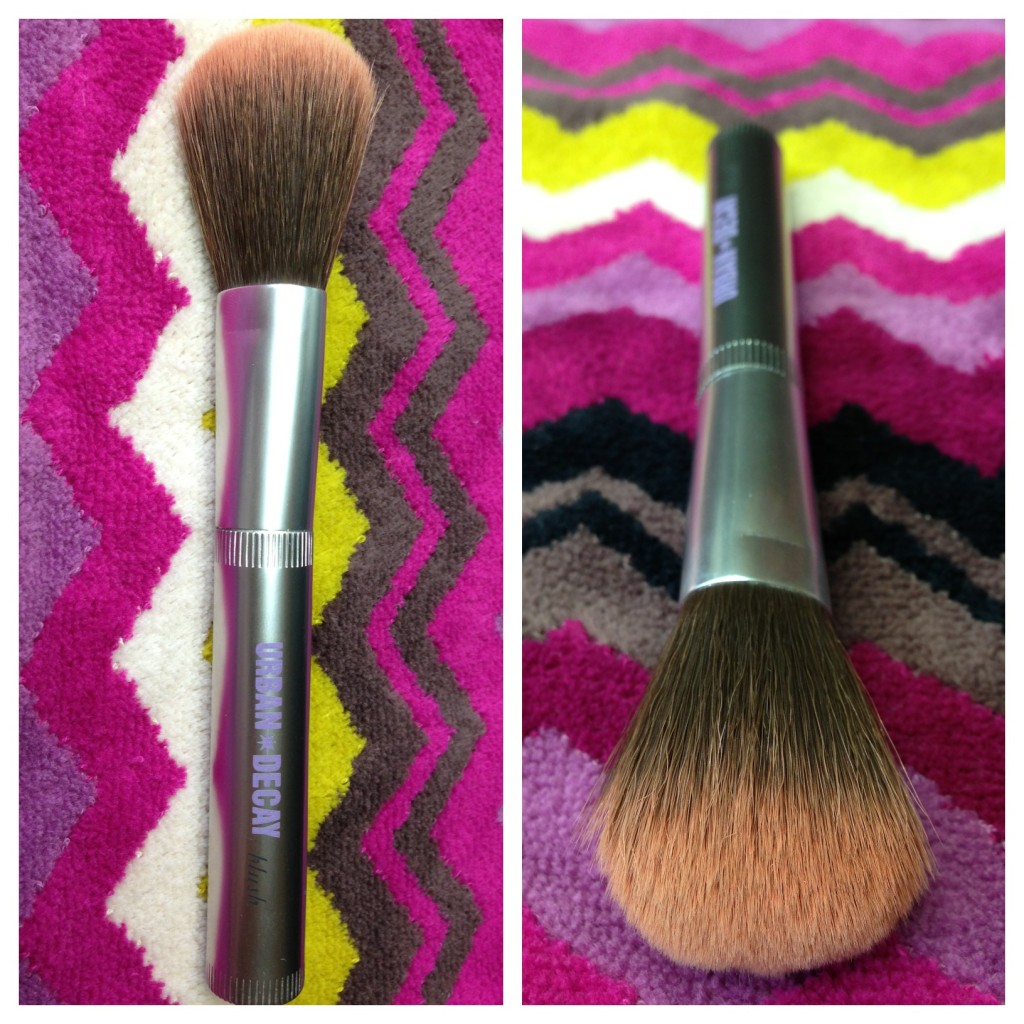
Blush brush, Urban Decay, N/A 

It doesn’t look like Urban Decay makes this particular brush anymore, but any blush brush you’re comfortable with will work. This one from ELF is $3, and has pretty good reviews overall, but a few complaints. I haven’t used their brushes personally, but I’ve heard from several places that their brushes are as good as high end brushes. Also, did I mention it’s $3?!

I use this brush for my blush, and any shimmery blush/bronzers. I’m sure you all know blush goes on the apples of your cheeks, but be careful not to bring it too close to your eyes, nose, or mouth. You should be blending your blush with the top of your contour line if you’re taking that extra step, again being careful not to drag your contour color down your face.

*****

That’s it for the face brushes. Well, the super basic ones anyways. We’ll pick up tomorrow with eyeshadow and brow brushes.

Does anyone have any questions about these brushes? Are there any brushes or techniques you’re curious about? Ask me now, because in a couple hours I’m going to do Jillian and I might not make it.

IF I DON’T, AVENGE ME, OK GUYS? I SWEAR I’LL HAUNT YOU IF YOU DON’T.

*If my eyeshadow is going to be smoky, dark, glittery, or otherwise prone to ruining all my hard work by sprinkling all over finished foundation, I’ll do foundation, contouring and cheeks after I finish my eyes. You can clean up any mistakes or fallout without smudging your face that way. Have you ever totally given yourself raccoon eyes trying to clean up a smoky eye on top of your face makeup? It’s enough to make me throw down my brush, take off my pants, and say, “Fuck this! I’m staying home.”

Standard