Beauty Tools, Cleansers, Education, Maintenance, Skincare

Cleaning Your Brushes: Bacteria and YOU!

When was the last time you washed your makeup brushes? A month ago? Last year? Never?

NEVER?!

DID YOU JUST SAY NEVER?!

I just…

I mean…

I can’t even…

That’s not ok.

It’s not like I’ve never been guilty of letting my brushes get dirty. For a long time, it didn’t even occur to me to wash them. I think I thought since I was the only one using them, it wasn’t necessary.

WRONG. JUST SUPER, SUPER WRONG.

Oils, dust, dirt, makeup, bacteria…these are the things that live on your dirty brushes. So then you use them, and you smear all that gross stuff around your skin. Doesn’t that sound awful? Keeping your brushes clean is good for the life of your tools, and it’s good for the life of your skin. Plus, it’s really easy and super satisfying.

photo-2

These are my dirty brushes. It’s been way too long since the last time I washed them. I’m really trying to get my skin in tip top shape, and I figured getting my brushes clean was a good idea. I’m not really acne prone, but I get those little white bumps. You can’t really see them unless you’re really looking, but I know they’re there, and I know what they are. Tiny little underground bacteria rocks. Gross. Have you ever tried to squeeze one of those out? That’s how I end up with a big hole in my face.

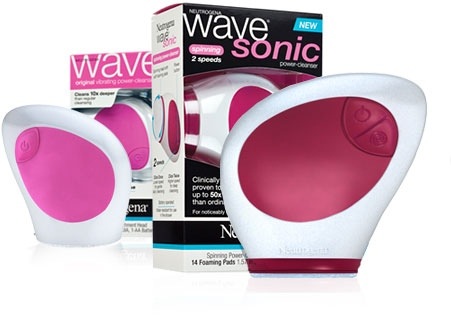
First, you’re going to need a cleanser. You can use a mild shampoo, like a baby shampoo, but I prefer to use a cleanser specifically for brushes. Those usually have the added benefit of being antibacterial.

sephora brush shampoo

Sephora, 2 oz., $7

I use this brush shampoo from Sephora. It does a great job of pulling even the most pigmented colors out of my brushes, and a little bit goes a long way.

After you’ve decided on a shampoo, and you’ve washed all the dirty dishes in your sink, you’re ready to get started!

First, thoroughly saturate your brush with lukewarm water.

photo 2

DO NOT drop it down the garage disposal. This was a dangerous game I was playing here. If any of those suckers had slipped down into that disgusting pit, that brush would have been dead to me. Like, might as well flip the switch and chop it into a million pieces because I never want to see it again. So, yeah, get your bristles good and wet, being careful not to lose it forever.

Next, squirt a small amount of brush shampoo into the palm of your hand.

photo 3

Don’t skimp, but don’t go crazy either. You want enough to break everything up, but not so much that you can never rinse it out, or you waste a bunch.

Then, swirl that brush around in the palm of your hand. You can go crazy here.

clean brush gif

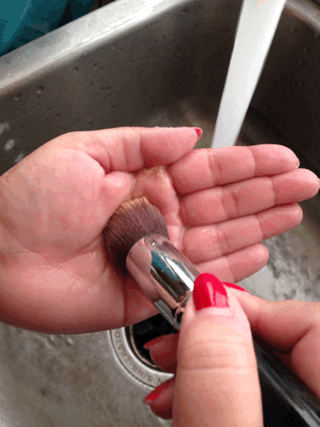
Really scrub it good! You’ll start to see all the makeup coming out of the bristles, it’s pretty gnarly. Add more shampoo if you feel like it’s running short. Sometimes, I do this part twice. Especially on my foundation brush. That’s the one in all the pictures, as you can see, it was really dirty.

After you’re satisfied the shampoo has lifted out all the makeup and debris, give it a good, thorough rinse in the lukewarm water.

photo-2 copy

I see that this photo is sort of redundant. But, I’m trying to be as detailed as possible! Rinse, rinse, rinse the brush. Rinse it so good. Rinse it until the water is clear, and the bristles feel clean. You DO NOT want any extra shampoo or makeup left behind. That would make this whole thing totally pointless.

After your brush has been fully rinsed, gently squeeze out any excess water, and then reshape your bristles and lay your brush flat, to dry.

photo-2 copy 2

I like to put mine on a towel so they don’t go anywhere, and water doesn’t collect underneath the handles. I also like to let the bristles hang over the edge. That way, they dry evenly and you don’t have to come in and flip them. I wash my brushes when I know they’ll have plenty of time to dry, preferably overnight.

When everything is dry, just get the bristles fluffed back the way they need to be, and you’re all set! No more gross tools of cross contamination!

How often you clean your brushes is up to you. If you use your brushes on anyone else, you have to wash them after every time you use them. If yours is the only face they touch, then once is a week is the gold standard. If you never ever clean your brushes, try to get into the habit at least once a month, and work up from there. It’s a good thing to do for your tools and your complexion. My brushes are an investment, and they’ve been pretty carefully curated. I’d like them to last as long as possible.

Keeping your brushes clean is the kind of thing that seems obvious, but I have a feeling that it’s the territory of people who are really serious about makeup. I know I sleep on cleaning my brushes more often than I should, and I’m a state licensed beauty professional. I should really know better! Let’s make it our Thanksgiving resolution to keep our brushes cleaner. Together, we can make the world a less bacteria laden place.

P.S. I cleaned my BeautyBlender with Ivory soap. It took forever to rinse it clean, and I haven’t used it since then, so I don’t know if it was a complete success. It LOOKS like it’s clean, but the jury is still out. I’ll let you guys know.

Standard
Beauty Tools, General, Personal

That’s my bag, baby!

Check it out, guys! Austin Powers joke! BA-BAM! COMEDY.

So, Jason got me a new makeup bag for my birthday, and I’m doing the big swap/clean right now. I thought I’d run down a list of the things I always have in my makeup bag for you guys. It’s going to be a long list.

makeup bag

I’m doing this on the couch while I watch CONAN. 

Let’s start on the left, and work our way up.

Blushes and Bronzers

MAC Sheertone Blush in “Peaches”

Urban Decay Baked Bronzer in “Gilded”

NARS Blush in “Super Orgasm” (ALL TIME FAVE)

MAC Creme Bronzer in “Beach Bronze”

MAC Mineralize Skinfinish in “Give Me Sun”

MAC Mineralize Skinfinish in “Redhead”

Mascaras

Benefit “They’re Real”

Benefit “Bad Gal Plum”

Concealers, Highlighters and Primers

Benefit “High Beam”

Marcelle BB Cream in “Golden Glow”

Benefit “Watt’s Up”

NARS  Pore-Prime Pore Refining Primer

MAC Select Cover-Up in NW20

Tarte Clean Slate Face Primer

MAC Lustre Drops in “Sun Rush”

MAC Select Moisture Cover in NC20

Urban Decay Lip Primer Potion

Urban Decay Eyeshadow Primer Potion in “Eden” (ALL TIME FAVE)

Urban Decay Eyeshadow Primer Potion

Eyeshadow Palettes

Urban Decay Naked Basics (NEW FAVE!! Thank you, Click!!)

Urban Decay Naked (the original) (ALL TIME FAVE)

Urban Decay Naked 2 (ALL TIME FAVE)

Foundation and Finishing Powders

Ben Nye Neutral Set

MAKE UP FOR EVER HD Foundation (ALL TIME FAVE)

e.l.f. High Definition Powder

LIPSTICKS AND LIP GLOSSES!!!

Fresh Sugar Rose

Urban Decay Lipstick in “Jilted” (ALL TIME FAVE)

Sephora Lip Gloss Pencil 05

NYX Matte Lipstick in “Indie Flick”

Urban Decay Lip Gloss in “Guys Heart Betsey”

MAC Lustreglass in “Flashmode”

Sephora Collection Color Lip Last #12 “Royal Raspberry”

Revlon Colorburst Lip Butters in “Tutti Frutti,” “Peach Parfait” and “Cupcake”

Maybelline Vivids in “Fuchsia Flash”

Model Co Matte Lipstick in “Peony”

MAC Lip Glass in “Schemer”

OCC Lip Tar in “Queen”

Urban Decay Lip Gloss in “Naked”

Urban Decay XXX Shine Lip Gloss in “Heatherette”

Urban Decay Lipstick in “Naked”

MAC Lip Glass in “Hush, Hush Rose”

NARS Lip Gloss in “Super Orgasm”

MAC Lipsticks in “Honey Love,” “Russian Red” and “Rebel” (Russian Red is MY JAM! ALL TIME FAVE!!)

Urban Decay Revolution Lipstick in “69”

Clinique Almost Lipstick in “Black Honey” (OG ALL TIME FAVE)

CHAPSTICK

Eyes

Essence Gel Eyeliners in “Midnight in Paris” and “London Baby”

Urban Decay Moondust Eyeshadow in “Diamond Dog”

Stila Magnificent Metals in “Vintage Black Gold”

Urban Decay “Heist”

MAC “Trax” (ALL TIME FAVE)

NARS “Galapagos”

Sephora Collection “Aspen Summit”

Anastasia Brow Powder Duo in “Brunette/Dark Brown”

Lip and Eye Pencils

Cover Girl Perfect Blend Pencil in “Mink”

MAC Lip Pencil in “Burgundy”

Urban Decay 24/7 Glide-On Eye Pencil in “1999”

Urban Decay 24/7 Glide-On Eye Pencil Duo in “Zero/Whisky” (ALL TIME FAVE)

Urban Decay 24/7 Glide-On Eye Pencil in “Flipside”

Urban Decay 24/7 Glide-On Eye Pencil in “Smoke”

Sephora Lip Pencil in “Pure Pinky”

MAC Lip Pencil in “Spice”

Urban Decay 24/7 Glide-On Lip Pencil in “Wicked”

NARS Velvet Gloss Lip Pencil in “New Lover”

Urban Decay Super Saturated High Gloss Lip Color in “Crush”

Stila Stay All Day Waterproof Liquid Eyeliner in “Intense Black”

Sephora Eye Pencil in “Pure White”

Urban Decay 24/7 Glide-On Eye Pencil in “Perversion”

Miscellaneous!

Double barreled pencil sharpener

Eyelash curler

Rubberband!!

Brushes

There are a ton of brushes in there, but I’m not going to run through them because I’ve already done that, in detail, HERE, HERE and HERE.

*****

makeup bag finished

TA-DAA!! The finished product!

I’m super stoked because my new makeup bag has an inner zipper pouch, so I can throw all my lip and eye pencils in there and cut out the possibility of a loose lid coming off and smearing color all over everything. This is why I had to wipe EVERYTHING down before it went into the new bag, it was all spotted with liner! Makeup wise, there are few things more frustrating than doing your makeup without realizing you have greasy, black pencil all over your hands. You learn about that mess the hard way when you go to make a tiny adjustment with your finger, and put a black smudge on the center of your perfectly contoured and powdered nose.

These are my ride or die soldiers right HEAH. I use this stuff all the time, it all travels with me, I take the contents of this bag VERY SERIOUSLY. Some of it is always in there, some of it gets cycled out, but the list mostly stays the same. If anything, it just grows. I keep having to buy bigger and bigger bags. I imagine once I get my acrylic drawers, I’ll pare the bag down a little more. But, until then, ALL HAIL MY BAG OF TRICKS.

I hope this peek into my makeup bag is fun for you guys! If anyone has any questions about how I use any of this stuff, or if you want to see swatches of anything in particular, let me know!

Standard
Beauty Tools, General, Nails

Pretty Ladies All In a Row

Big home improvement projects happening here over the weekend:

polish rack

These are load bearing polishes.

I’ve always dreamt of having an acrylic wall mounted nail polish rack. I love to see my preciouses there all lined up and pretty. Like, really, you’re supposed to keep your polish in a cool, dark place. But that was not working for me.

polish bin

UGH. UNACCEPTABLE.

They were all living in this bin, under our bed, slowly poisoning us while we slept. Probably. Opening that bin was a real kick to the sinuses, like WHOA. You can’t see a thing in there either. When I arranged all the polish in there in the first place, I thought it’d be clever to group them all by color. That lasted about 5 seconds. It feels dumb to tell people they have to put the polish back into the color family from which it came, so I just stood by and let anyone who looked through them put them back wherever. And, come on, what the fuck, like I’m going to dig through there and try and find the small section of silver polish when I need to put something back? No way.

This rack is so much better! It appeals to my warped sense of order that only works on makeup and my underwear drawer. You can’t open a closet in our house without risking a junk avalanche, but my chonies are neatly rolled and tucked away in straight, sexy, rows in their drawer, and my nail polish is arranged by brand. I *think* about rearranging the towel closet a lot, if that counts for anything.

My Farm Boy put up the rack for me, and then I got to work clearing out my polish bin.

I went with arranging them by brand instead of color, and I can not even explain to you how satisfying it was to click them all into place on the shelves. Hearing the literal click of the bottles on the acrylic and against each other while everything matched up and fit just right. Mmm. Heaven! I love it!

I’m going to need to do some reordering soon since I always have new polish in my future. I’m starting to see multiple acrylic racks in my future too….next up, stacked clear acrylic drawers for all my makeup. My train case in my closet is too out of sight, out of mind.

I ordered my rack off Amazon, and we picked up the wall mounts at a hardware store. It all came together pretty quickly!

The only downside is now Jason can see exactly how much polish I have. Too bad I always need more, FOR RESEARCH.

Buy this acrylic display rack HERE.

Standard
Beauty Tools, Face, Links

Egg Shaped Sponge Tutorial

The Beauty Department has a REALLY great tutorial on the correct way to use those egg shaped foundation sponges. I mean, I thought I was using mine right, but I’m going to have to reevaluate my technique.

tbd beauty blender tutorial

Click through HERE to read the step by step tutorial. You really need to read it to get it right.

I love my Beauty Blender! They apply lighter than a brush, so they’re really great for anyone who wants a dewy, soft finish on their foundation.

Standard
Beauty Tools, Face

Brush Up, Part 3

AKA THE BRUSHENING.

Ok. We’ve covered all the basic brush essentials, and now we’re going to get into some brushes that aren’t necessary if you’re a meat and potatoes kind of makeup person. If you are, I don’t know what you’re doing here. I deal in excess, honey. Always, always, por vida.

These last three tools don’t come out for every face, but they always make an appearance for a going out face, or a photo face. I don’t highlight and contour to go to Target, I can barely manage to convince myself to put a bra on.

RELATED: Yesterday, I went to Starbucks at 7:00 AM without a bra on, but nobody could tell because I kept my arms crossed over my nips. Pretty smart, huh? Nobody every knew what I had under there.

Yuck. I can’t stop thinking about meat and potatoes makeup.

Let’s go.

brushhighlight

Sonia Kashuk Concealer Brush, Target

I love this brush for precision concealing and highlighting. The pointed tip makes it so much easier to get in the small areas under eyes, and the nose.

Like I said, I don’t always use highlighting, but when I do, working with product off the back of my hand, I highlight around the eyes, down the center of the nose, chin, and sometimes above the mouth. You use highlighter on and around the things you want to accentuate, to bring attention to them and make them more prominent.

This brush also came out of a set, but this Sonia Kashuk foundation brush would do the same job.

brushhighlightpowder

Sigma Beauty, Large Fluff E50, $12

Never  walk away from your makeup without dusting powder over concealer or highlighter colors. It’s the law. And you, my friend, are not above the law. What do you want? Dusted or busted? Don’t get busted or you’ll get thrown in beauty jail. You and other beauty offenders (eyebrow manglers, hair crunchers, felony non-moisturizers, and repeat dick wagglers [regular jail was full, beauty jail is coed]) will be behind bars, and don’t bother having someone bake a cake with a file in it, they know all about that.

I use this brush to stay out of beauty jail. A light brush of translucent finishing powder makes your concealer smoother and keeps it in place.

brushbeautyblender

Beautyblender, Amazon, 2 for $21.47

I love everything about this little tool. It’s adorable, it feels good in my hand, and it works beautifully. You can use it dry or damp to apply foundation or blend, I prefer to use it damp. Using it to apply foundation gives a soft, smooth, and almost airbrushed finish; while the dampness of the sponge stretches your cosmetics and gives great build-able coverage. I sometimes use it damp, with no makeup, to press over my finished face and blend any edges or lines that may still be present from contouring and give everything a seamless look.

The name brand BeautyBlenders are kind of expensive, and they do sell similar sponges at Sephora and Target, but I can’t vouch for them. They’re just sponges, right? What’s going to happen? They blow up?

*****

I hope everyone found this series helpful! Good brushes can come from all kinds of different places. I have and use brushes that came from makeup counters, drugstores, and art supply stores, just keep an eye out and you’ll curate a great collection too.

Are there any brushes or tools you’re curious about or any problems you’re having with current brushes? Does everyone know about washing their brushes, or would that be helpful too? Let me know!

And hey, don’t forget about God’s makeup brushes: your fingers. Just keep those washed too, ok? Maybe more frequently than your actual brushes.

Standard
Beauty Tools, Eyeshadow

Brush Up, Part 2

I hope everyone enjoyed the first post about brushes yesterday. I realized way too late that I should have cleaned all the makeup off them before taking pictures. Oh well.

brusheyes

  I did this. With these brushes and some liner. Maybe some spit. 

Don’t use spit to fix your makeup mistakes. That’s really bad. The enzymes in your saliva that break down food will go to work on your skin. Gross! That tip was extra. *WINK*

Everyone pumped for some eye and lash tools?! Enjoy more photos of my dirty brushes!

Y’ALL READY FOR THIS?!

brushroundshadow

Sephora, N/A

Great. Another brush that doesn’t appear to exist anymore. Good opener, Sarah! That’s ok. Serenity now. This brush is technically a crease brush, but it pulls double duty most days; applying base color and then blending crease colors. The rounded end is good for getting into the eye crease, and the fluffy bristles are great for picking up a lot of color to wash over large areas, or blending to finish. Sephora has THIS brush on sale right now. It looks like it’s similar, and it’s only $6.

brushcrease

Sonia Kashuk Medium Eye Shadow Brush, Target, $5.99

I bought this brush as part of a set. Like, the brush above, I use this one for detail work and large areas. It’s flat, so it’s great for making a really defined crease, packing color into inner and outer corners, and brushing shadow under your eye. This brush is the same brush, with a different handle. If you don’t have a lot of eye makeup brushes, or if you aren’t sure how to start pulling together a set, this brush, along with the one above, is a good place to start. Their versatility will get you through a lot of looks.

brusheyebrow

Tigi Angle Brush

This slim little brush has been kicking around with me since I was in beauty school. I’d use it sometimes to layer shadow over liner, but it wasn’t part of the regular roster until I figured out how amazing it was for putting on my eyebrows. I use it with my Anastasia Beverly Hills Brow Powder Duo to make my brows soft and natural looking, or sharp. The tips of the bristles are so thin, you can really make the exact lines you need. I even still use it to really define my liners with shadow, or as a liner brush. It’s really good to have at least one fine, thin brush in your stash. They come in handy all the time!

brushlashbrushandcurler

Tigi Brow & Lash Groomer, Amazon, $12.98 & Eyelash Curler, Sephora, $17

Comb for untangling clumpy lashes, brush for softening and taming brows. I don’t think I can explain anymore than that.

I have one weirdo eyelash on each eye that defies all my curling effort, choosing instead to either stick straight out or grow downward into my eyeball. No amount of crimping and poking will make those rebel lashes behave. I usually end up pulling them out with my tweezers. I do not tolerate insubordination. Get in line or get yanked out!

Even if your lashes are actively working against you, like mine, curling is still an important step. Curling your lashes opens up your eyes, and makes your lashes look thicker. When you use your curler, make sure to gradually curl up the length of your entire lash, guiding the shape into a gentle curve; instead of crimping directly at the lash line, which will cause your lashes to go straight up and down.

*****

That’s it for this set of brushes. Look for the last post in this series on Monday; I’m going to talk about some highlighting and blending tools. Look, I’m not going to say it’s going to change your life, but you’ll never know if you don’t show up. Right? Better safe than sorry. That’s what I always say!

Standard
Beauty Tools

Brush Up, Part 1

brushesgif

BRUSHES!!!! OTHER STUFF!!!

Isn’t that so hypnotic? Are you getting sleepy? I could stare at it all day. Right now, it’s being scored on my laptop to “Need You Tonight” by INXS and it works great!

I’ve been curating my brush collection for years, and I thought showing you the basics I use for nearly every look, could be helpful. I know I’m always on the lookout for good brushes to add to the pack. I’ve got three entries coming up. We’ll do the regular basics today and tomorrow, and finish the series on Monday with the extra special finishing touches.

Let’s GO!

brushflatkabuki

Flat Kabuki Brush F80, Sigma Beauty, $18

Sigma Beauty has really awesome brushes. They’re solid and well made so they feel comfortable in your hand, and the bristles don’t shed all over you. I can’t tell you how many times I’ve walked away from a beauty counter, after letting them put makeup on me, looking like I need a shave and a chest wax.

After moisturizing, this brush is the first step* in my makeup routine. I pump a dab of foundation onto the back of my hand, then use this brush, in a circular motion, to pick up the foundation and buff it onto my face. I apply my foundation from the center out towards my hairline and chin. I also use this brush to clean up any contouring lines.

brushangledkabuki

Flat Angled Kabuki Brush F88, Sigma Beauty, $18

This brush is perfect for using with powder or cream bronzer to contour your cheekbones, hairline, jaw and nose. I don’t use it for anything else but contouring, really. I don’t do a ton of contouring in my regular look, but I do my cheeks no matter what. A good rule of thumb for cheekbone contouring is to place the beginning of your contour so it lines up with the top of your ear. For a lot of people, that’s like, right there under your, um, sideburns, I guess? It might adjust up or down a little as you get it to come into line with the top of your ear, but it’s about there. I read the other day that when contouring, to think of your cheek makeup as a bra; the bronzer is the underwire so it gives the most support. You want it to run from next to your ear, under the apple of your cheeks, and end around the outer corner of your eye, being careful not to bring it down too far, that defeats the purpose.

brushblush

Blush brush, Urban Decay, N/A 

It doesn’t look like Urban Decay makes this particular brush anymore, but any blush brush you’re comfortable with will work. This one from ELF is $3, and has pretty good reviews overall, but a few complaints. I haven’t used their brushes personally, but I’ve heard from several places that their brushes are as good as high end brushes. Also, did I mention it’s $3?!

I use this brush for my blush, and any shimmery blush/bronzers. I’m sure you all know blush goes on the apples of your cheeks, but be careful not to bring it too close to your eyes, nose, or mouth. You should be blending your blush with the top of your contour line if you’re taking that extra step, again being careful not to drag your contour color down your face.

*****

That’s it for the face brushes. Well, the super basic ones anyways. We’ll pick up tomorrow with eyeshadow and brow brushes.

Does anyone have any questions about these brushes? Are there any brushes or techniques you’re curious about? Ask me now, because in a couple hours I’m going to do Jillian and I might not make it.

IF I DON’T, AVENGE ME, OK GUYS? I SWEAR I’LL HAUNT YOU IF YOU DON’T.

*If my eyeshadow is going to be smoky, dark, glittery, or otherwise prone to ruining all my hard work by sprinkling all over finished foundation, I’ll do foundation, contouring and cheeks after I finish my eyes. You can clean up any mistakes or fallout without smudging your face that way. Have you ever totally given yourself raccoon eyes trying to clean up a smoky eye on top of your face makeup? It’s enough to make me throw down my brush, take off my pants, and say, “Fuck this! I’m staying home.”

Standard
Bargain Beauty, Beauty Tools

Sephora Precision Pore Cleansing Pad

Good skin has always come pretty easy for me. Fat ass? Yes. Ugly armpits? The struggle. Do my nail beds suck? I guess. But, the good skin was there, so I was lucky.

Lucky until the year of my 30th birthday.

All of a sudden, my face flipped on me. I had big, gross, scaly dry patches on my cheeks, a pimply forehead and overall dull skin. It looked terrible. I was a monster. I ran through tons of different skincare lines trying to clear up my garbage face before finally caving and buying a Clarisonic. The Clarisonic was an expensive dream come true! It worked so well, I really felt like it was going to be the key to everything.

*Cue my legendary laziness*

It’s soooo fucking hard to remember to take that thing into the shower with me! And that was back when we only had one bathroom. Now, the Clarisonic lives on a counter in one bathroom, but I shower in the other bathroom. The bathroom with the dumb pedestal sink and no counter space. (P.S. Pedestal sinks are fucking stupid.) So, I’ve been relegated to using the Clarisonic maybe once a week, if I would remember to grab it before I got in the shower. The Clarisonic doesn’t do much if you don’t use it like you’re supposed to; that’s pretty much the point of the thing. So, my pimple forehead and zitty nose were back in full effect. Until…UNTIL, I discovered this little Pore Cleansing Pad from Sephora.

sephora scrubber

I LOVE THIS THING! Use it in circular motions with your face wash, and the little bristles gently scrub out all your makeup, sweat, and whatever other questionable things you might have on your face. It’s small enough to live on a ledge in my shower, it works great, it’s gentle enough to use every day, and it only costs FIVE DOLLARS. Five freaking dollars! Plus, since it’s silicone, it can be disinfected. That’s a big draw for me because it’s only a matter of time before I drop it, bristles down, onto the shower floor where I pee on my own dirty feet, just like Madonna.

I bought one for Jason and his terrible man skin too, and he looks like a not flaky, clear pored motherfucking angel now. We all look like angels! I’ve been using this about 5-6 days a week, with my Clarisonic the other 1 or 2 days, for about 3 weeks, and it has made a huge difference. My skin is smoother, my deep seated forehead pimples are clearing up, and my tone is starting to even out. I love this thing so much; I really, really want Sephora to make a big one so I can use it to scrub my whole body. It’s my beauty product dream right now. Really. I stand in the shower, scrubbing my nose with the little pad, and think about how great it would be to use an oven mitt sized pad to scrub my cellulite. BIG DREAMS.

I can not recommend this beauty tool enough. To me, it’s a reasonable replacement for a Clarisonic if you don’t want to drop $120 on an exfoliating brush. Get one! Hell, get five! It’s almost summer, that means lots of makeup free face time. Get your skin ready now!

Standard